
How To
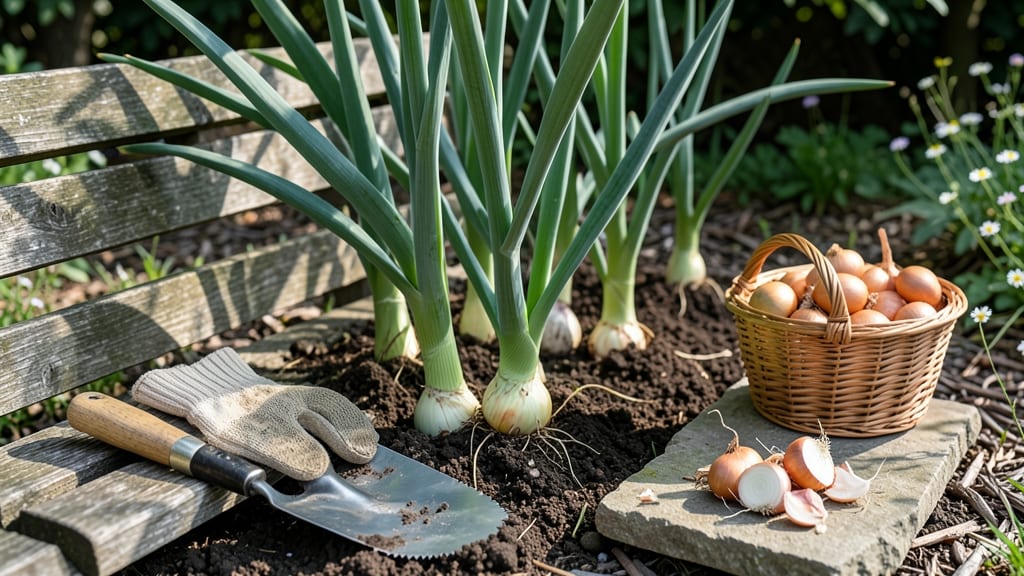
Harvesting onions at the right time means the difference between sweet, flavorful bulbs and tough, pungent ones that end up in the compost 🧅 — and it’s easier than you think.
Picture this: you’ve nurtured your onions all season, only to pull them too early and end up with tiny, underdeveloped bulbs, or too late and find them sprouting or rotting in the soil.
The key is knowing when the tops yellow and flop over, when the neck thickens, and how to use the soil pull test to check without wasting a single bulb.
In this guide, I’ll walk you through the exact signs to look for—from leaf color to bulb size—and when to harvest based on your climate zone. Whether you’re growing short-day, intermediate-day, or long-day varieties, you’ll learn how to time it perfectly for the best flavor and storage life.
Plus, I’ll share my foolproof method for curing and storing onions so they last all winter, because nothing beats the satisfaction of pulling a perfect bulb from your garden—and making it last.

When to harvest onions: the best time based on variety and climate
Timing your onion harvest correctly transforms your garden from a patch of green tops to a treasure trove of flavorful bulbs. Onions mature at different rates depending on whether they're short-day, intermediate-day, or long-day varieties, and your local climate plays a huge role.
Harvest too early, and you'll end up with small, pungent onions. Wait too long, and they'll split or rot in the ground.
Understanding these three onion types is your first step to success. Short-day onions thrive in warm climates and mature quickly, while long-day varieties need cooler summers and more time to develop. Even within these categories, local frost dates and temperature fluctuations shift the ideal harvest window.
For example, in USDA Zone 5, you might harvest storage onions in early September, while in Zone 9, they could be ready as late as November.
🌱
| Onion Type | Best Harvest Time | Key Cues | Climate Zones |
|---|---|---|---|
| Short-Day | Late summer (80-100 days) | Yellow tops, 1-2" bulbs | Zones 7-10 |
| Intermediate-Day | Mid to late summer (100-120 days) | Floppy green tops, 1.5" bulbs | Zones 4-8 |
| Long-Day | Late summer to early fall (120-140 days) | Dry tops, 2" firm bulbs | Zones 3-6 |
For short-day onions, watch for the tops to yellow and flop over—this usually happens in late July or August in warm climates. These varieties, like 'Texas Early White', are perfect for areas with hot summers.
In contrast, long-day onions like 'Sweet Sandwich' need cooler temperatures to mature, so you'll likely harvest them in September or October in northern regions.
Your local first frost date is another critical factor. If you're in Zone 5 and frost is expected by October 15, harvest your storage onions by early September. In Zone 9, where winters are mild, you might extend your harvest window until November.
Always aim to harvest 2-3 weeks before the first frost to give onions time to cure properly.
Don't rely solely on days-to-maturity labels—those are based on ideal conditions. Instead, combine visual cues with your local climate. Look for yellowing tops, flattened necks, and bulbs that are 1-2 inches wide.
When you gently pull on a leaf, it should come out easily if the onion is ready. If the bulb feels soft or the tops are still green and upright, wait a few days.
🌿
Regional differences matter too. In the Pacific Northwest, cool summers slow onion growth, so you might need to harvest long-day varieties later than the labeled days-to-maturity.
Meanwhile, in the Southeast, heat can cause onions to bolt prematurely, so plant short-day varieties and harvest them quickly once the tops yellow. Always adjust your timing based on actual weather patterns, not just zone averages.
Pro tip: Keep a harvest journal for a few seasons. Note when you planted, the variety, and the exact date you harvested. This helps you fine-tune your timing for future gardens.
For example, if your 'Yellow Sweet Spanish' onions always mature by August 15 in your area, you'll know to start harvesting then next year.
Finally, consider your onion's end use. If you're growing green onions or scallions, you can harvest them early by cutting the tops when they're just 6-8 inches tall. For storage onions, wait until the bulbs are fully mature to ensure they'll keep well through winter.
The right harvest time ensures you get the most from your garden—whether that's fresh eating, storage, or even selling at farmers' markets.
✂️
The soil pull test: a zero-waste method to check onion readiness
One of the easiest ways to determine if your onions are ready for harvest is the soil pull test, a gentle method that lets you check bulb maturity without damaging the plant.
This technique is especially useful when you're unsure whether your onions have reached their full size or if they're still growing.
By using this method, you avoid the frustration of pulling onions too early—only to find small, underdeveloped bulbs—or too late, when they’ve already started to sprout or rot in the soil.
The soil pull test works by gently lifting a few onions from the soil to inspect their bulb size and neck thickness. This way, you can assess readiness without disturbing your entire crop. It’s a zero-waste approach that ensures you only harvest what’s truly ready, saving you time and effort.
Plus, it’s a great way to avoid overharvesting, which can lead to wasted produce or even stress on your plants.
How to Perform the Soil Pull Test
- Step 1: Choose a sunny day – Wait for a day when the soil is dry enough to crumble easily. This makes it easier to lift onions without damaging them.
- Step 2: Select 2-3 onions – Pick onions that are showing signs of maturity, such as yellowing tops or slightly flopped leaves.
- Step 3: Loosen the soil – Use a small garden fork or your hands to gently loosen the soil around the base of the onion. Avoid digging too deep to prevent harming nearby bulbs.
- Step 4: Lift and inspect – Gently grasp the onion’s base and pull it upward. Check for a 1-2 inch bulb diameter and a ½-inch thick neck. If the bulb feels firm and the neck is thick, it’s ready.
- Step 5: Replant if needed – If the onions aren’t ready, replant them immediately and wait another week before testing again.
- Step 6: Harvest the rest – Once you confirm readiness, harvest the entire batch by carefully digging around the base of each plant.
If your onions fail the soil pull test, don’t panic. Premature onions can still be used—just harvest them and treat them as green onions or scallions. These can be used fresh in salads, stir-fries, or as a garnish.
However, if the bulbs are already sprouting or have a soft, mushy feel, they’ve overstayed their time in the soil and should be composted to avoid spreading disease to other plants.
For storage onions, timing is critical. Harvest them when the tops are yellow and flopped over, and the bulbs are firm. If you’re growing short-day onions, aim for late summer, while long-day onions are best harvested in early fall.
Always harvest on a dry day to prevent rot during curing. After harvesting, let the onions dry in a well-ventilated area for a few days before storing them in a cool, dark place.
Remember, the soil pull test is your best friend when it comes to harvesting onions. It’s a simple, effective way to ensure you’re getting the most out of your garden without wasting a single bulb.
With practice, you’ll become a pro at knowing exactly when to harvest, giving you sweet, flavorful onions that last all season long.