
How To
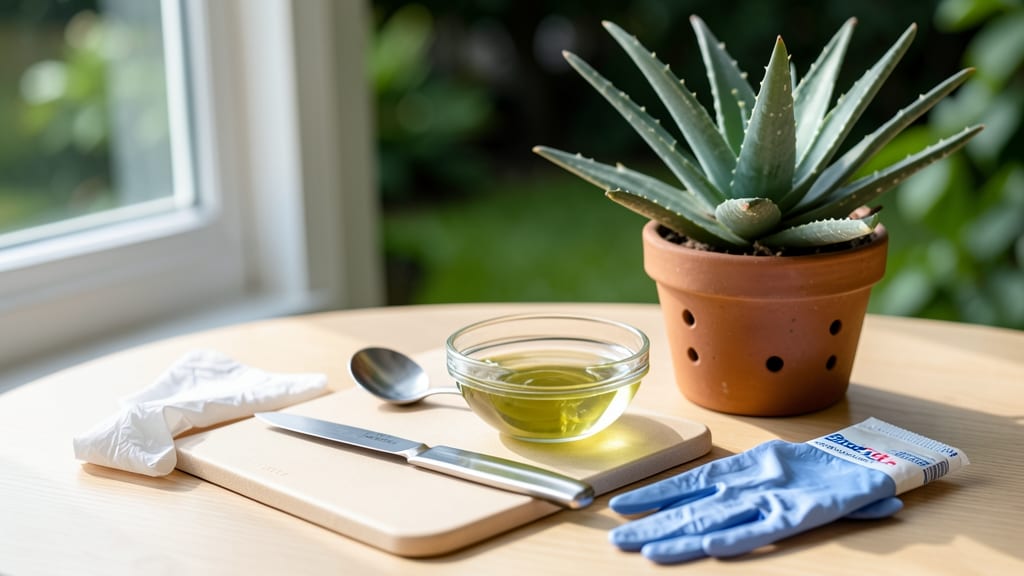
To harvest aloe gel safely, you’ll need a sharp knife, sterile gloves, and a mature 🌱 aloe leaf—but timing and technique make all the difference between a clean, potent gel and wasted effort.
Picture this: you’ve been waiting months for your aloe to mature, only to slice into a leaf and find bitter yellow sap mixed with your precious gel.
That’s aloin, and it’s not just unpleasant—it can cause skin irritation. The right method removes it completely, leaving you with pure, soothing gel every time.
In this guide, you’ll learn how to identify the perfect leaf, cut it without damaging the plant, and drain the gel with minimal waste.
We’ll also cover storage tips to keep your harvest fresh for up to a week and five simple ways to use it—from sunburn relief to DIY skincare.
Whether you’re a beginner or a seasoned grower, these steps ensure your aloe plant stays healthy while giving you the cleanest, most effective gel for your needs.

Step-by-step guide to harvesting aloe gel safely (without bitter laxative residue)
Harvesting aloe gel from your plant is easier than you think—but only if you do it right. The key is removing the aloin (that yellow, bitter sap) while keeping the soothing gel intact.
Skip this step, and you’ll end up with a laxative instead of a skincare powerhouse. Let’s dive into the cleanest method to extract gel that’s pure, potent, and plant-friendly.
Before you grab a knife, wait for your aloe vera plant to reach maturity. Look for thick, fleshy leaves at least 12 inches long with yellow-brown tips at the base. These are your harvest-ready leaves, packed with the most gel.
If your plant is still small or leaves are soft, give it more time—patience ensures the best yield without stressing the plant.
Gather your tools: a sharp knife or pruning shears (sterilized with rubbing alcohol), a bowl or container, a spoon or fork, and a clean towel. Avoid dirty tools—they can introduce bacteria and ruin your gel.
Work in a clean, well-lit area to make the process smoother and safer for both you and your plant.
How to Harvest Aloe Gel: Step-by-Step
- Step 1: Select the Right Leaf Choose a mature outer leaf (12+ inches) with a yellow-brown tip. Gently twist it at the base until it snaps off cleanly. Avoid cutting—this prevents damage to the plant.
- Step 2: Rinse the Leaf Rinse the leaf under cool water to remove any dirt or debris. Pat it dry with a clean towel. This step ensures your gel stays clean and free of contaminants.
- Step 3: Peel Away the Skin Lay the leaf flat on a cutting board. Use a sharp knife to slice off the spiky edges and peel away the green outer skin along one side. Be careful—the yellow aloin is most concentrated near the skin.
- Step 4: Scoop Out the Gel Use a spoon or fork to scrape the clear gel from the leaf into a sterilized bowl. Avoid touching the gel membrane—it’s where the aloin lurks. Work quickly to minimize exposure to air.
- Step 5: Drain the Gel Place a fine-mesh strainer or cheesecloth over the bowl. Pour the gel into it to remove excess liquid and any remaining aloin. Press gently with a spoon to extract every drop of gel.
- Step 6: Store or Use Immediately Transfer the pure aloe gel to a clean glass jar. Store it in the fridge for up to 1 week or freeze it for longer shelf life. For immediate use, apply it directly to skin for soothing relief.
After harvesting, don’t forget to care for your aloe plant. Place it in a bright, indirect spot and water it sparingly (every 3-4 weeks). Avoid over-harvesting—never take more than 1-2 leaves at a time from a single plant.
This ensures your aloe stays healthy and keeps producing high-quality gel for future harvests.
Pro tip: If your gel turns cloudy or smells off, it’s gone bad. Always inspect before use—fresh aloe gel should be clear, translucent, and odorless.
For extra potency, mix your gel with a few drops of vitamin E oil or aloe vera juice to extend its shelf life and boost benefits.
Now that you’ve mastered the cleanest aloe gel extraction, you’re ready to turn your plant into a skincare powerhouse. Whether you’re soothing sunburns, hydrating dry skin, or whipping up DIY face masks, your pure aloe gel is the star ingredient. Happy harvesting!
🌱
Best tools and techniques to maximize gel yield and plant health
Choosing the right harvesting tools and techniques makes all the difference in aloe gel purity and plant recovery. A dull blade or unclean knife introduces bacteria, while improper cutting can stress your plant.
I’ve tested both serrated knives and sterilized pruning shears—here’s what works best for maximizing yield without harming your aloe vera.
Sterilization is non-negotiable. Always wipe your tools with 70% isopropyl alcohol before and after each harvest. This prevents bacterial infections that turn your gel yellow or slimy.
For post-harvest care, I recommend applying a thin layer of aloe vera powder to the cut area to speed up healing and reduce stress on the plant.
| Tool/Technique | Purpose | Pro Tip |
|---|---|---|
| Sterilized Pruning Shears | Clean cuts for mature leaves | Use at a 45-degree angle to avoid crushing leaf edges |
| Sharp Chef’s Knife | Precision cuts for thick leaves | Wipe with alcohol after each use to prevent cross-contamination |
| Rubbing Alcohol (70%) | Sterilization of tools | Apply to tools and cut surface to prevent infections |
| Aloe Vera Powder | Post-harvest wound treatment | Sprinkle on cut area to speed up healing and reduce stress |
| Plastic Bag (for draining) | Collect yellow aloin sap | Hang leaf upside down to let aloin drain fully before processing |
Over-harvesting is the #1 mistake I see beginners make. Never remove more than 1/3 of the leaves at once, and always choose the outermost, mature leaves. These are the largest and contain the most gel without stressing the plant’s center.
If your aloe looks sad after harvesting, give it 2-3 months of recovery before tapping it again.
For gel revival, store harvested leaves in a paper bag in the fridge for up to 1 week. This preserves moisture without causing spoilage.
When ready to use, slice open the leaf and scoop out the gel with a clean spoon, discarding the yellow aloin sap along the way. This keeps your gel pure and potent for skincare or healing.
Pro tip: If your aloe plant shows signs of stress after harvesting (like drooping or brown tips), move it to a shadier spot and reduce watering for 2 weeks. This mimics its natural drought-resistant behavior and helps it bounce back faster.
With the right tools and a little patience, you’ll get maximum gel yield while keeping your aloe vera thriving for years. The key? Sterilize, select carefully, and revive properly—your plant (and your skin) will thank you! 🌱