
How To
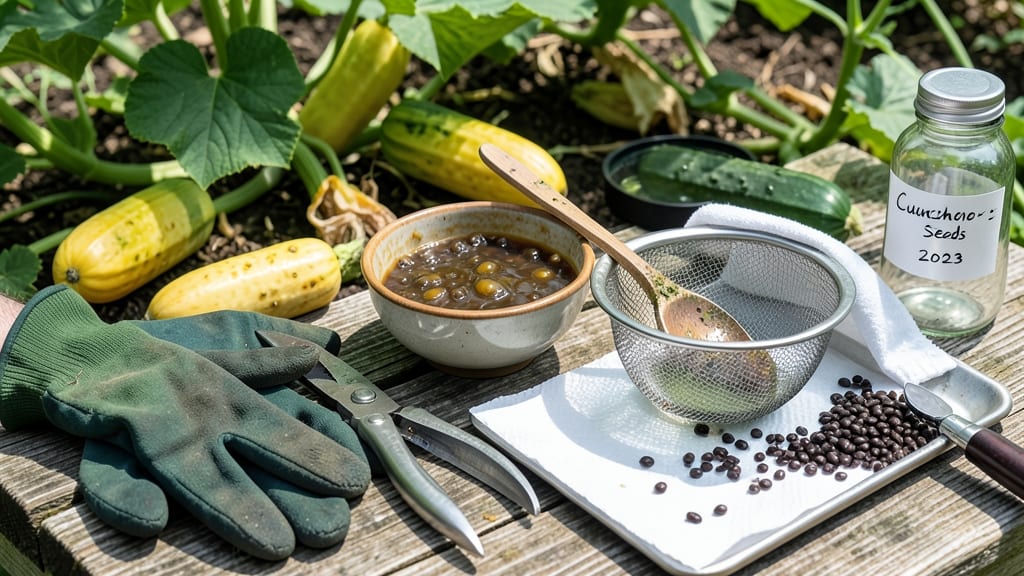
Harvesting cucumber seeds from your homegrown 🥒 plants is the easiest way to save heirloom varieties—and it only takes a few weeks of patience after harvest.
Picture this: you’ve spent all summer growing your favorite cucumbers, only to watch them bolt or rot before you could save seeds. The good news? With the right timing and a little fermentation trick, you can turn overripe cucumbers into a stash of viable seeds that’ll last for years.
This method isn’t just for gardeners with decades of experience—it’s a simple, foolproof process that works even for beginners. Below, I’ll walk you through selecting the perfect cucumbers, extracting the seeds, and drying them properly to avoid mold and maximize germination.
By the end, you’ll have a supply of seeds ready for next year’s garden, plus the satisfaction of knowing you’re preserving a piece of your harvest for future seasons.
Step-by-step guide to harvesting cucumber seeds from overripe fruit
Saving cucumber seeds from your garden is a rewarding way to preserve heirloom varieties and ensure next year’s harvest matches your favorite flavors. The key lies in selecting the right cucumbers and following a precise fermentation process to maximize germination rates.
Overripe cucumbers with yellowing stems are your best bet—these contain fully mature seeds ready for extraction.
Why ferment? Fermentation removes the gelatinous coating around seeds, which can inhibit growth. Without this step, your seeds may sprout poorly or not at all. Plus, fermenting helps identify viable seeds—the good ones sink, while empty or non-viable ones float to the top.
Let’s dive into the exact process to turn your overripe cucumbers into high-quality seeds.
⚠️ Pro Tip: Always use open-pollinated cucumbers (like heirloom varieties) for seed saving—hybrids won’t produce true-to-type offspring. Avoid treated or store-bought cucumbers, as their seeds may not germinate.
How to Harvest Cucumber Seeds: Step-by-Step
-
Step 1: Select Overripe Cucumbers
Choose yellowing cucumbers (6–8 inches long) with soft, overripe flesh. Look for yellowing stems—this signals maturity. Avoid cucumbers with mold or pests. -
Step 2: Scoop Out Seeds
Cut the cucumber open lengthwise and scrape seeds into a clean bowl using a spoon. Add 1 cup of water to cover the seeds. Let sit for 3–5 days at 70–80°F (fermentation phase). -
Step 3: Ferment and Separate
Stir daily to prevent mold growth. After 3 days, viable seeds sink—discard floating debris. Pour the mixture through a fine mesh strainer to catch seeds. -
Step 4: Rinse and Dry
Rinse seeds with cool water to remove fermentation residue. Spread seeds on a paper towel or seed drying screen in a well-ventilated area (avoid direct sunlight). -
Step 5: Store Properly
Once seeds are completely dry (3–5 days), store in a paper envelope or glass jar with a silica gel packet to absorb moisture. Label with the variety name and harvest year.
Fermentation is critical—it removes the bitter pulp surrounding seeds, which can inhibit germination. Skipping this step often results in low sprout rates or weak seedlings. If you notice white mold during fermentation, discard the batch immediately and start fresh with a new cucumber.
For best results, aim for a fermentation temperature between 70–80°F. Too cold, and the process slows; too hot, and mold risks increase. If your kitchen is cooler, place the bowl near a sunny window or use a seed fermentation kit with a built-in thermometer.
Once dried, your seeds should be hard and dark-colored. Test a few by placing them on a damp paper towel—if they sprout within 3–5 days, your batch is ready for storage.
Store seeds in a cool, dark place (like a pantry) to maintain viability for up to 5 years. 🌱
Remember: Heirloom cucumbers like ‘Lemon Cucumber’ or ‘Straight Eight’ produce the most reliable seeds. If you’re saving seeds from a hybrid variety, germination rates may drop, and offspring won’t match the parent plant. Always prioritize open-pollinated varieties for seed saving. 🥒
Troubleshooting tip: If your seeds smell rotten or sour during fermentation, rinse them immediately and dry in a well-ventilated area. This prevents mold from spreading to your entire batch. With patience and precision, you’ll have a stash of homegrown cucumber seeds ready for next season’s garden! ✂️
Best cucumber varieties for seed saving and how to identify them
Not all cucumbers are created equal when it comes to seed saving. Heirloom varieties produce the most viable seeds because they’re open-pollinated, meaning their traits stay true from generation to generation. Hybrid cucumbers, on the other hand, are bred for specific traits like disease resistance or uniform size, but their seeds won’t grow true to type.
If you’re saving seeds, stick with heirlooms like Lemon Cucumber or Straight Eight—these are my top picks for seed-saving success.
To identify which cucumbers are best for seed saving, look for overripe fruit with a yellowing stem end and soft, mushy flesh. These are the ones packed with mature seeds ready for harvest.
Avoid harvesting seeds from cucumbers treated with growth regulators or those labeled as hybrid (look for F1 on the seed packet). The best candidates are usually the ones you’d normally toss because they’re too soft or seedy for eating.
When harvesting seeds, prioritize cucumbers that are fully mature but not yet rotting. A good rule of thumb is to let them sit on the vine until the skin turns slightly yellow or the stem detaches easily. Overripe cucumbers with a fermented smell are ideal—they’re packed with fully developed seeds.
If you’re unsure whether a cucumber is ready, cut it open: if the seeds are dark and plump, they’re ready for saving.
One common mistake is saving seeds from cucumbers that were cross-pollinated by bees or other insects. To avoid this, plant only one variety at a time or isolate varieties by at least 10 feet.
If you’re growing multiple types, consider using row covers during flowering to prevent accidental cross-pollination. This ensures your saved seeds will grow into plants identical to their parents.
Once you’ve identified the right cucumbers, the next step is extracting the seeds. Scoop out the gel-like flesh and seeds into a jar, add water, and let it ferment for 3-5 days. This process removes the bitter coating around the seeds, improving germination rates.
After fermentation, rinse the seeds thoroughly and dry them on a paper towel for 1-2 weeks—this is where most seed-saving failures happen if done incorrectly.
By focusing on heirloom varieties and following these identification tips, you’ll maximize your seed-saving success. The key is patience: let cucumbers fully mature, avoid hybrids, and give seeds proper drying time.
Soon, you’ll have a stash of seeds ready to grow into next year’s garden—just like the ones you enjoyed this season! 🌱