
How To
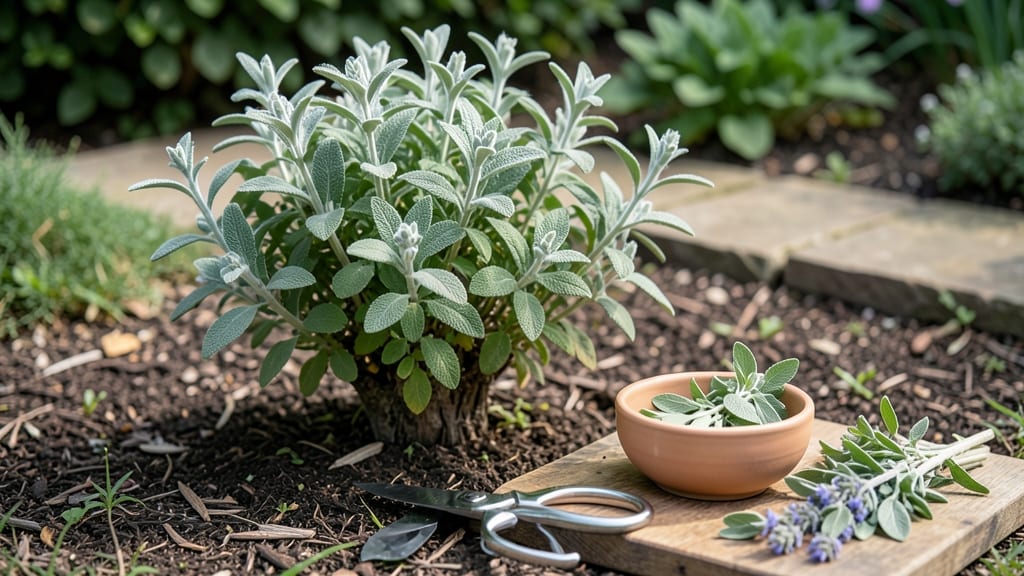
To harvest garden sage properly, focus on cutting just above leaf nodes in late summer or early fall when the plant is mature and fragrant 🌿.
Ever reached for your sage only to find the stems woody and flavorless? That’s a classic sign of waiting too long—or cutting the wrong way. The key to a steady supply of aromatic leaves lies in timing, technique, and knowing when to stop.
Sage thrives when you take no more than one-third of its growth at a time, always targeting the newer stems just below the leaves. This encourages bushier regrowth while preserving that signature earthy flavor. Plus, harvesting before flowering keeps the leaves tender and potent.
In this guide, I’ll walk you through the exact steps—from sterilizing your tools to storing your harvest—so you can enjoy fresh sage all season without sacrificing your plant’s health.

When and how to harvest sage for maximum flavor and regrowth
Harvesting garden sage at the wrong time can leave you with bitter leaves or a leggy, unproductive plant. The key is understanding seasonal timing and proper cutting techniques to preserve flavor while encouraging new growth. Unlike annual herbs, perennial sage rewards patience—harvesting correctly ensures years of aromatic harvests.
For maximum flavor, focus on harvesting in late spring or early fall when leaves are fully mature but haven’t yet flowered. This timing ensures you capture the peak essential oils that give sage its signature aroma.
Avoid harvesting after flowering, as the plant redirects energy to seed production, leaving leaves less potent.
Now let’s break down the essentials in this summary-table to help you plan your harvests like a pro:
| Harvest Factor | Best Practice | Why It Matters |
|---|---|---|
| Best Time of Year | Late Spring (May-June) or Early Fall (September-October) | Avoids flowering stems and ensures peak flavor. |
| Plant Height | At least 6-12 inches tall | Small plants can’t recover from heavy pruning. |
| Cutting Technique | Never remove more than ⅓ of the plant at once | Prevents shock and encourages bushier regrowth. |
| Stem Condition | Cut just above a leaf node on flexible stems | Avoids woody stems that won’t regrow. |
| Frequency | Every 4-6 weeks during growing season | Encourages continuous new growth. |
| Post-Harvest Care | Water deeply and fertilize lightly | Supports recovery and prevents nutrient loss. |
Spring harvesting is ideal because it coincides with new growth after winter dormancy. Focus on younger stems—they’re more tender and packed with flavor. In fall, you’ll find a second flush of growth before the first frost.
This is perfect for drying sage for winter use, as the leaves contain concentrated essential oils.
When harvesting, always use clean, sharp pruners to avoid damaging stems. Cut just above a leaf node (the point where leaves attach) to encourage branching. Never cut into woody stems, as these won’t regrow. Instead, target the green, flexible growth at the tips of branches.
To encourage bushier regrowth, never remove more than one-third of the plant’s foliage in a single session. This rule applies whether you’re harvesting for fresh use or pruning for shape. After cutting, give your sage a deep watering and a light application of balanced fertilizer to support recovery.
If your sage starts looking leggy or sparse, it’s a sign you’ve been harvesting too aggressively. In this case, reduce frequency and focus on pruning for shape rather than yield. A well-pruned sage plant will reward you with denser foliage and more flavorful leaves over time.
For perennial sage, late summer is also a great time to do a light pruning to tidy up the plant before winter. This removes any dead or diseased branches and promotes a fresh start in spring.
Just avoid heavy pruning in fall, as the plant needs energy to harden off for winter.
Pro tip: Label your sage varieties if you grow multiple types. Some, like golden sage, have different flavor profiles and may require slightly different harvesting times. Always harvest before flowering to maintain the best taste and aroma.
With the right timing and technique, your garden sage will thrive for years, providing a steady supply of fragrant leaves for cooking, crafts, or medicinal uses. Happy harvesting! 🌿
Step-by-step guide to pruning sage for continuous harvests
Pruning your garden sage correctly is the secret to a bountiful, flavorful harvest year after year. Unlike many herbs, sage thrives when you cut it back—just follow the one-third rule to avoid stressing the plant.
The key is to remove only young, tender growth while leaving enough foliage for photosynthesis. This ensures your perennial sage stays lush and productive for seasons to come.
Before you begin, gather your tools: sharp, sterilized pruners or clean scissors, and a small spray bottle of rubbing alcohol (70% or higher) for disinfection. Diseases like powdery mildew can spread through contaminated tools, so never skip this step.
Work on a dry, sunny morning when the leaves are fully dry from dew—this reduces the risk of fungal infections and makes for cleaner cuts.
How to Harvest Garden Sage
- Step 1: Identify healthy, non-flowering stems—these are your best candidates for harvest. Avoid cutting into woody, mature branches, as these won’t regrow well.
- Step 2: Using clean pruners, cut just above a leaf node (the point where leaves attach to the stem). This encourages new growth from that spot. Aim for 3–4 inches above the base of the plant.
- Step 3: Remove no more than ⅓ of the plant’s foliage at once. For example, if your sage is 12 inches tall, trim only the top 4 inches of the tallest stems. This prevents shock and promotes bushier growth.
- Step 4: Sterilize your tools between cuts by wiping the blades with rubbing alcohol or a 10% bleach solution. This prevents the spread of bacterial or fungal pathogens like Verticillium wilt.
- Step 5: After pruning, water deeply at the base to help the plant recover. Avoid wetting the leaves to reduce disease risk. Mulch around the base with 2–3 inches of organic mulch (like straw or wood chips) to retain moisture.
- Step 6: Store harvested sage in a paper bag (not plastic) in the fridge for up to 1 week, or hang bundles upside down in a dark, dry, well-ventilated space for 1–2 weeks to dry for long-term use.
After pruning, your sage will send out new growth within 2–3 weeks, especially if you’ve given it plenty of sunlight and water. To keep your plant compact and bushy, pinch back the tips of new growth occasionally.
This encourages lateral branching, which means more leaves for future harvests. Never cut into old wood—sage struggles to regrow from woody stems, so focus on the current season’s growth.
For year-round harvests, time your pruning to coincide with spring and early fall. In USDA Zone 6a, this means pruning in April–May and again in September–October. Avoid heavy pruning in late summer, as this can stress the plant before winter dormancy.
If your sage flowers, remove the blooms immediately—this redirects energy back into leaf production instead of seed development.
Finally, monitor your sage for signs of stress or disease after pruning. Yellowing leaves may indicate over-pruning or nutrient deficiency, while brown spots could signal fungal infection.
If you notice issues, reduce future cuts and focus on soil health—amend with compost or balanced fertilizer (like 10-10-10 NPK) to support recovery. With the right care, your sage will reward you with fragrant, flavorful leaves for years to come.