
How To
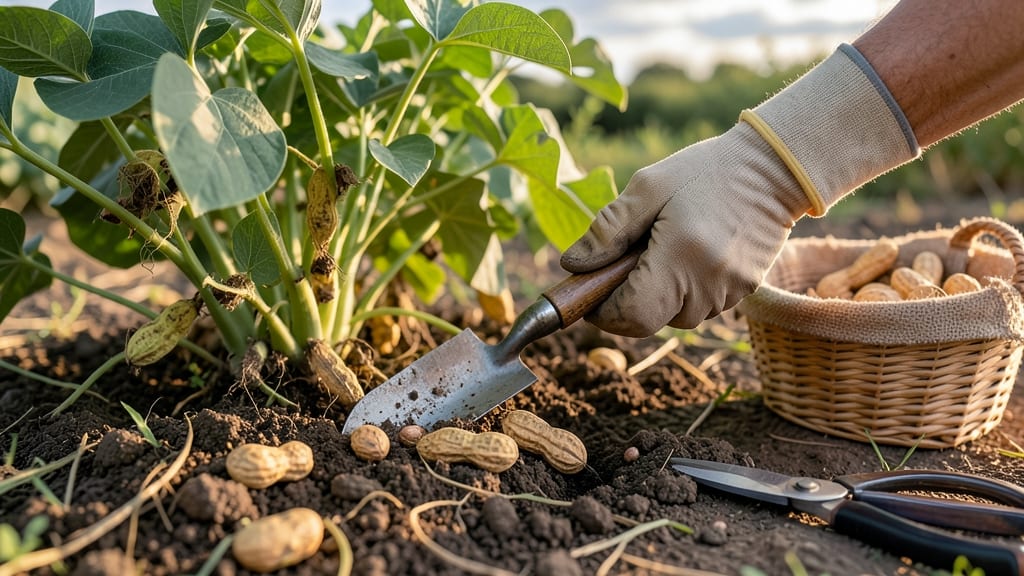
Harvesting groundnut 🥜 at the right time means pulling them from the soil when pods are firm and mature—any earlier, and you risk underdeveloped nuts; too late, and they shrivel or rot.
Picture this: your vines turn golden-yellow, the leaves crunch underfoot, and a gentle shake sends the pods rattling like marbles. That’s your cue—but timing isn’t the only trick. The way you pull them from the soil makes all the difference between a bountiful haul and a handful of broken pods.
Most gardeners miss the soil-pulling window because they focus on leaf color alone, but the real secret lies in the firmness of the pods and the moisture of the ground.
A dry spell before harvest? That’s actually a good thing. Too wet, and you’ll wrestle with stubborn soil—and your crop.
In this guide, I’ll walk you through the exact step-by-step method to harvest groundnuts without damage, plus the three key mistakes that waste even the best crop. Ready to turn your patch of earth into a peanut treasure trove?

When and how to identify groundnuts ready for harvest
Harvesting groundnuts at the perfect moment ensures maximum yield and flavorful pods. Look for three key signs: yellowing vines, dry leaves, and firm pods.
These visual cues tell you when to act before the pods shrivel or rot in the soil. Missing these signs means risking underdeveloped or moldy harvests.
Start by checking the vine color. Healthy, ready-to-harvest vines turn a straw-yellow hue, signaling maturity. If leaves remain green and lush, the pods aren’t ready yet. Ignoring this step often leads to small, shriveled groundnuts that lack flavor and nutritional value.
Next, test pod firmness by gently shaking the vines. If you hear a dry rattling sound, pods are mature and ready. Soft or silent pods mean they need more time. This tactile check is critical—overlooking it can result in broken shells during harvest.
Finally, inspect the leaves and stems. Ready-to-harvest plants show dry, crispy leaves and stems that snap easily. If leaves are still flexible or green, wait 1-2 weeks before harvesting. This final check ensures you’re not harvesting too early or too late.
| Sign | Ready to Harvest? | Action |
|---|---|---|
| Vine Color | ✅ Straw-yellow | Proceed with harvest |
| Vine Color | ❌ Green | Wait 1-2 weeks |
| Pod Sound | ✅ Dry rattle | Harvest immediately |
| Pod Sound | ❌ Silent | Wait 5-7 days |
| Leaf Condition | ✅ Dry and crispy | Harvest within 3 days |
| Leaf Condition | ❌ Green and flexible | Wait 10-14 days |
Timing is everything with groundnuts. Harvest too early, and pods are underdeveloped and tasteless. Harvest too late, and they’ll shrink or spoil in the soil. Aim for 75-90 days after planting, but always prioritize the visual cues over the calendar.
One common mistake is relying solely on days since planting. Instead, combine the vine color, pod sound, and leaf condition for accuracy. For example, a dry rattle with yellow vines is foolproof, while green leaves with a soft pod mean more waiting.
After confirming readiness, prepare for harvest by watering lightly the day before. This softens the soil slightly, making it easier to pull pods intact. Avoid heavy watering, as soggy soil can break shells or attract pests. Use a hand fork to loosen the soil gently before pulling.
Finally, harvest on a dry, sunny day. Wet conditions can damage pods or encourage mold growth. Lay harvested vines in a single layer on a clean tarp to dry for 3-5 days before shelling. This step preserves quality and flavor for long-term storage.
Mastering these visual and tactile cues transforms your harvest from hit-or-miss to consistently perfect. With practice, you’ll spot the ideal moment every time, ensuring a bountiful and delicious groundnut yield.
Step-by-Step soil-pulling method for damage-free harvesting
Once your groundnut vines turn yellow and dry, it's time for the most delicate part of harvesting: pulling the pods from the soil without damaging them. The soil-pulling method I’ve perfected ensures you maximize yield while keeping those precious pods intact.
The key? A combination of gentle pressure, the right soil moisture, and a little patience.
Start by checking the soil moisture—it should be slightly damp but not soggy. If the soil is too dry, pods may crack when pulled. If it’s too wet, they’ll stick stubbornly to the roots.
Aim for that ideal middle ground where the soil clumps together when squeezed but doesn’t form a muddy mess. This usually happens 1-2 days after watering in warm, dry conditions.
- 🌱 Step 1: Gently grasp the vine near the base, about 2 inches from the soil. Use both hands to support the plant—this prevents sudden tugging that can snap pods.
- 💧 Step 2: Loosen the soil around the roots with your fingers or a small hand fork. Work in a circular motion to avoid tearing the pods.
- 🪴 Step 3: Pull upward at a 45-degree angle. Apply steady pressure rather than yanking—think of it like pulling a stubborn weed, not ripping it out.
- ✂️ Step 4: Shake the plant vigorously over a clean tarp or bucket. The pods will rattle free from the roots, while dirt falls away.
- 🌿 Step 5: Inspect for stubborn pods. If some remain attached, use your fingers to gently twist them free. Never pry with tools—this risks cracking.
- 🌡️ Step 6: Brush off excess soil with a soft brush or let the vines dry in the sun for 1-2 hours to remove loose dirt.
For stubborn pods that refuse to budge, don’t force it! Instead, soak the roots in warm water for 10 minutes to soften the soil, then retry the gentle pulling method.
This trick works wonders for hard-packed clay soil or when pods have grown extra deep. Patience here saves you from broken pods and wasted effort.
After harvesting, spread the vines out in a well-ventilated, dry area for 3-5 days to fully dry. This prevents mold and makes shelling easier. Avoid direct sunlight, which can over-dry the pods and make them brittle.
Once completely dry, shell the pods by hand or with a nutcracker, then store them in an airtight container in a cool, dark place.
Pro tip: If you’re harvesting in humid conditions, speed up drying by placing the vines on a screen or mesh rack to allow airflow underneath. This cuts drying time in half and keeps your pods safe from moisture-related spoilage.
With this method, you’ll harvest 90% of your pods intact, even in less-than-ideal soil conditions. The secret? Treating your groundnuts like delicate treasures—because they are!