
How To
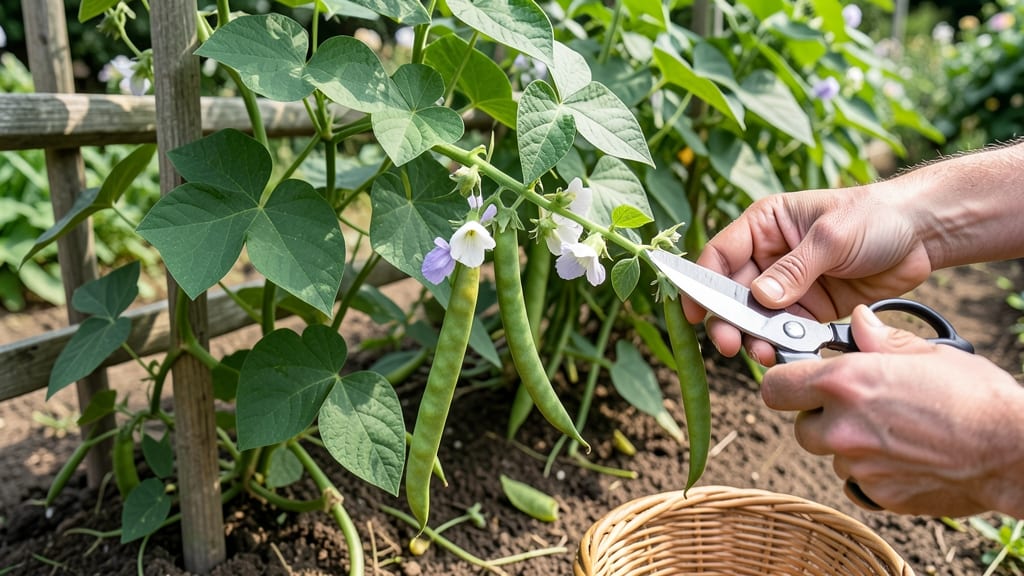
To harvest pole beans at their sweetest, focus on pod size, firmness, and color—4–6 inches long and vibrant green is the perfect window 🌱.
Pole beans are one of the fastest-growing vegetables in your garden—but timing their harvest is an art. Pick them too early, and they’ll be tough; too late, and they’ll turn woody or lose sweetness.
Most gardeners miss the peak flavor because they rely on size alone. The real secret? A simple touch test: snap a pod between your fingers—if it cracks crisply, it’s ready.
Below, I’ll show you 3 foolproof tests to nail the harvest, plus how often to pick and what tools to use for a bountiful, tender crop all season.

3 Touch tests to determine when pole beans are ready for harvest
Harvesting pole beans at the perfect moment ensures maximum flavor and tenderness. Unlike bush beans, pole beans climb and produce continuously, so you’ll need to check them regularly. The key lies in your fingertips—these 3 simple touch tests will tell you exactly when to pick.
No guesswork, just science-backed tactile feedback to guarantee your beans are at their peak.
First, focus on the pod firmness. Overripe beans become tough and stringy, while underripe ones stay small and rubbery. Your fingers will feel the subtle difference between crisp yet yielding pods and those that are too firm or too soft.
This test alone cuts down on wasted effort by helping you avoid harvesting prematurely or too late.
Next, examine the seed development inside the pod. A perfectly harvested bean will have small, undeveloped seeds—think of them as tiny green pebbles. If you can see or feel fully formed seeds, the bean has passed its prime.
This internal check is crucial because external color alone can be misleading, especially in cloudy weather.
Finally, try the stem snap test. Gently pinch the stem where the pod attaches. If it snaps cleanly with a slight resistance, the pod is ready.
A stem that bends without breaking means it’s still too young, while a stem that feels woody signals the bean has overstayed its welcome. This test helps you determine the ideal moment without damaging the plant.
Press the pod gently with your thumb and forefinger. It should feel crisp but slightly yielding, like a fresh green bean from the store. If it resists pressure (hard) or collapses (soft), it’s not ready.
Gently squeeze the pod to feel the seeds inside. If they’re small and undeveloped (like tiny pebbles), harvest immediately. Fully formed seeds mean the bean is past its prime.
Pinch the stem where the pod attaches. It should snap cleanly with slight resistance. No snap? Too young. Feels woody? Overripe. This is your green light for harvesting!
Visual cues also play a role, but they’re secondary to these touch tests. Look for vibrant green pods that are 4–6 inches long. However, color can fade in hot sun or under cloud cover, so always rely on your fingers first.
For example, a pod might look bright green but feel spongy—this is a red flag that it’s overripe.
Harvesting at the right stage isn’t just about taste—it’s about encouraging more production. When you pick beans at their peak, the plant redirects its energy to produce new flowers and pods.
This continuous cycle means a longer harvest season and a bountiful yield. Think of it as giving your pole beans a high-five for their hard work!
Pro tip: Use a small pruning shears or your fingers to harvest. Avoid tearing the stem, as this can damage the plant and invite pests. Work your way up the plant, starting from the bottom, to encourage upward growth.
This method also makes it easier to spot hidden pods that might have been missed during earlier checks.
If you’re unsure whether a pod is ready, err on the side of harvesting it. Beans continue to mature quickly, and once they turn woody, their flavor and texture decline rapidly. Remember, the goal is to enjoy tender, sweet beans straight from your garden—no compromises! 🌱
Finally, keep a harvest log to track when your pole beans reach peak readiness. Note the days after planting, pod size, and weather conditions. Over time, you’ll develop an intuition for the perfect harvest window.
This practice not only improves your success rate but also turns harvesting into a rewarding part of your gardening routine.
Step-by-step guide to harvesting pole beans without damaging the plant
Harvesting pole beans at the right time ensures tender, flavorful pods while keeping your plants productive. The key is to pick them regularly—every 2-3 days—before they mature into tough, stringy messes.
I’ve learned that gentle handling prevents damage to the vines, so I always use the right tools and techniques to make the process smooth for both me and my plants.
Timing your harvest correctly also depends on the time of day. Early morning is ideal because the pods are cool and crisp, making them easier to pick without bruising.
Avoid harvesting after rain or when the pods are wet, as this can lead to disease spread or soil splatter on your beans. Let’s dive into the step-by-step process to keep your pole beans thriving.
How to Harvest Pole Beans Like a Pro
-
Step 1: Choose the Right Tools
Use clean pruning shears or your fingers for small pods. Sharp shears prevent crushing, while fingers work well for delicate handling. Always sanitize tools with rubbing alcohol to avoid spreading diseases.
-
Step 2: Identify Ready Pods
Look for pods that are 4-6 inches long, bright green, and firm to the touch. Gently squeeze a pod—if it’s crisp but not hard, it’s ready. Avoid pods with bulging seeds or dry husks.
-
Step 3: Harvest with Care
Hold the vine with one hand and use your other hand to snip or pinch the pod just above the node (where the pod meets the vine). This encourages more pods to grow in that spot. Never tug—it can damage the vine.
-
Step 4: Maintain Plant Health
After harvesting, give your plant a light watering to replenish moisture. Remove any yellow or diseased leaves to improve airflow. This keeps your pole beans producing for weeks, not just a single harvest.
-
Step 5: Store Properly
Store harvested beans in the fridge for up to 5 days or freeze them for long-term use. Place a paper towel in the container to absorb moisture and prevent spoilage. This preserves their freshness for later meals.
One of the biggest mistakes I see is over-harvesting in a single session. While it’s tempting to pick everything at once, this can shock the plant and reduce future yields.
Instead, focus on harvesting 10-15 pods per session, especially if your plant is still young. This balance keeps your pole beans productive all season long.
If you notice your beans becoming woody or stringy, it’s a sign you waited too long. From now on, check your plants every 2-3 days and harvest aggressively during peak production months (July-August in most climates).
This consistency ensures you’ll enjoy a steady supply of fresh, tender pole beans all season.
Remember, the goal is to encourage more growth, not exhaust the plant. By following these steps, you’ll not only harvest perfectly ripe beans but also keep your pole beans happy and thriving for weeks to come. Happy harvesting! 🌱