
How To
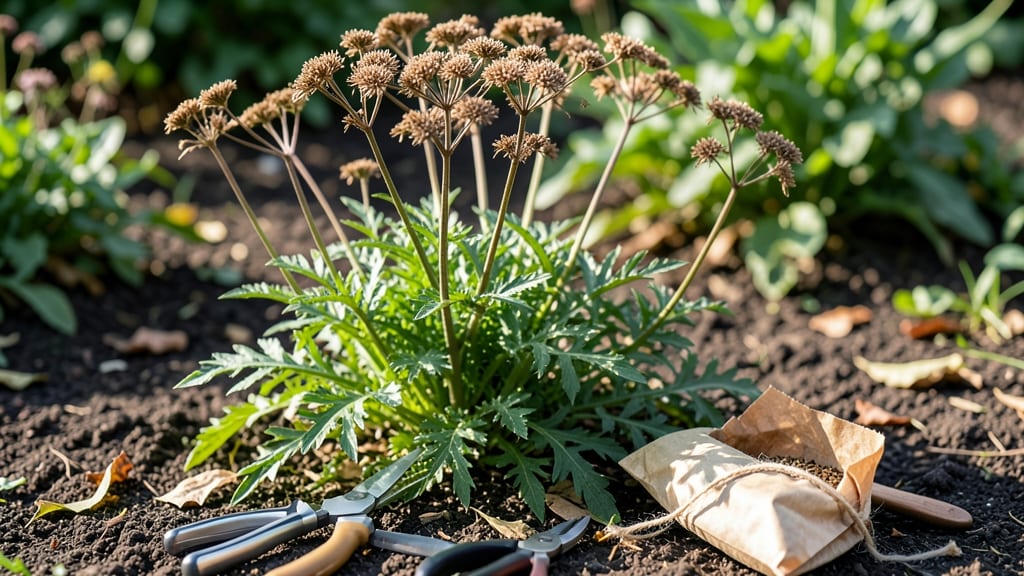
Harvesting yarrow seeds at the right time ensures you’ll have viable seeds for next year’s garden, but timing is everything—miss it, and frost ruins your hard work.
Picture this: your 🌼 yarrow plants stand tall in late summer, their seedheads drying into delicate brown clusters. One wrong move, and those seeds turn to mush before you can save them. The key is knowing when to act—before the first frost in Zone 6a.
This guide walks you through how to spot mature seedheads, the best tools for harvesting, and how to dry and store them for long-term use. Whether you’re growing yarrow for medicinal purposes or just love its feathery blooms, these steps will help you preserve seeds like a pro.
By the end, you’ll know exactly when to cut, how to test viability, and even how to extend your seed supply beyond one season—so you can keep your garden thriving year after year.

Perfect timing for harvesting yarrow seedheads before frost damage
Harvesting yarrow seeds at the right moment ensures high germination rates and healthy plants for next season. The critical window falls between late summer and early fall, just before the first frost damages the seedheads.
In most USDA Zone 6a regions, this means aiming for late August to mid-September, but timing varies by climate.
Frost is the biggest enemy of seed viability. When temperatures drop, moisture freezes inside the seedheads, causing internal damage and reducing germination success. Even a light frost can ruin your harvest, so staying ahead of the weather is key.
Pay close attention to your local frost date forecasts—harvesting 2-3 weeks before the expected frost gives you a safety margin.
Identifying mature yarrow seedheads is simpler than you might think. Look for dry, papery flower clusters that have turned a uniform brown color. When you gently shake them, the seeds should rattle inside.
If the seedheads are still green or slightly pliable, they’re not ready—wait a few more days. Overripe seedheads may scatter seeds prematurely, so timing is everything.
Regional adjustments are crucial. In warmer climates (Zones 7-10), yarrow may produce seeds as late as October or November, while in cooler northern zones (Zones 3-5), harvesting should start as early as mid-August.
Always prioritize dry, sunny days for harvesting to prevent mold and ensure proper drying.
🌼 How to Harvest Yarrow Seeds: Key Steps
- 1. Wait for seedheads to dry: Harvest only when brown and papery, with seeds rattling inside.
- 2. Cut stems at the base: Use clean pruners or scissors to avoid damaging the plant.
- 3. Bundle stems upright: Tie 5-10 stems together with twine for easy hanging.
- 4. Hang in a dry, dark place: Suspend bundles upside-down in 60-70°F conditions for 2-3 weeks.
- 5. Shake out seeds: Once completely dry, gently rub seedheads over a paper bag to collect seeds.
Yarrow thrives in full sun and well-draining soil, but its seed production peaks when grown in ideal conditions. If your plants are underperforming (small flowers, few seedheads), consider adding compost or adjusting watering to encourage robust growth.
Healthy plants produce more viable seeds, so prioritize care in the spring and summer months.
One common mistake is harvesting too early. Green seedheads contain underdeveloped seeds that won’t germinate. Conversely, waiting too long risks frost damage or seeds scattering on the ground. Aim for fully mature but not overripe seedheads—this balance ensures the best results.
If you’re unsure, split a seedhead open: seeds should be dark and firm, not hollow or shriveled.
For gardeners in humid climates, extra caution is needed. High moisture can cause mold or rot during drying. Speed up the process by spreading seedheads on a screen in a well-ventilated area rather than hanging them.
This method also makes it easier to monitor for pests, like weevils, which can infest stored seeds.
Pro tip: Label your seed bundles with the harvest date and variety if you’re growing multiple types of yarrow. This helps track seed viability over time and ensures you’re planting the right varieties.
Store seeds in paper envelopes (not plastic) in a cool, dry place to maintain freshness for up to 2-3 years.
Mastering the timing for yarrow seed harvests takes practice, but the payoff is worth it. With viable seeds in hand, you’ll have a head start on next year’s garden—and who doesn’t love skipping the nursery trip?
Just remember: dry seedheads, no frost, and patience are your best friends in the seed-saving game. 🌿
Step-by-step guide to properly harvesting and drying yarrow seeds
Once your yarrow plants have produced those iconic flat-topped flower clusters, the real work begins—harvesting seeds at the perfect moment ensures high germination rates for next season. The key is patience and timing, as rushing or waiting too long can ruin your seed collection efforts.
I’ve learned the hard way that frost-sensitive seedheads need special attention before the first chill arrives.
Start by gathering your tools: a pair of sharp pruning shears, a brown paper bag for collecting seeds, and a dry, well-ventilated space for drying. Avoid plastic bags—they trap moisture and encourage mold.
The goal is to preserve seed viability while preventing spoilage, so every step matters. Let’s walk through the process together.
- 1 Identify mature seedheads: Look for brown, papery flower clusters that rattle when shaken. Avoid green or partially green heads—they’re not ready. The seeds should be dark and easily detachable when touched.
- 2 Cut stems cleanly: Use sterilized pruning shears to snip stems 2-3 inches below the seedhead. This prevents moisture from the stem from spoiling the seeds during drying. Work on a dry day to avoid dampness.
- 3 Bundle stems upright: Tie 5-10 stems together with twine or a rubber band, leaving the seedheads exposed. Hang them upside down in a dry, dark, and well-ventilated space (like a garage or shed) for 2-3 weeks. This mimics natural drying conditions.
- 4 Thresh seeds gently: Once fully dry, place the seedheads in a brown paper bag and crush them with your hands or a rolling pin to release seeds. Avoid using a blender—it can damage seed coats and reduce germination.
- 5 Winnow out debris: Spread seeds on a clean sheet of paper and use a fan or gentle breeze to blow away chaff and light debris. This ensures you’re left with pure, viable seeds ready for storage.
After drying, store your yarrow seeds in a paper envelope or glass jar with a silica gel packet to absorb moisture. Label it with the harvest date—seeds stay viable for 2-3 years if stored properly in a cool, dark place.
I always keep mine in the fridge for extra freshness.
Avoid these common mistakes: harvesting too early (seeds won’t germinate), using plastic containers (traps moisture), or storing seeds in humid environments. Even a slight misstep can reduce germination rates by 50% or more. With practice, you’ll develop an eye for the perfect seedhead maturity and timing.
Pro tip: If you’re short on space, lay stems on a wire rack instead of hanging them. Just ensure they’re elevated and dry. Once your seeds are ready, you’ll have a self-sustaining yarrow supply for years to come—no need to buy seeds again! 🌼