
How To
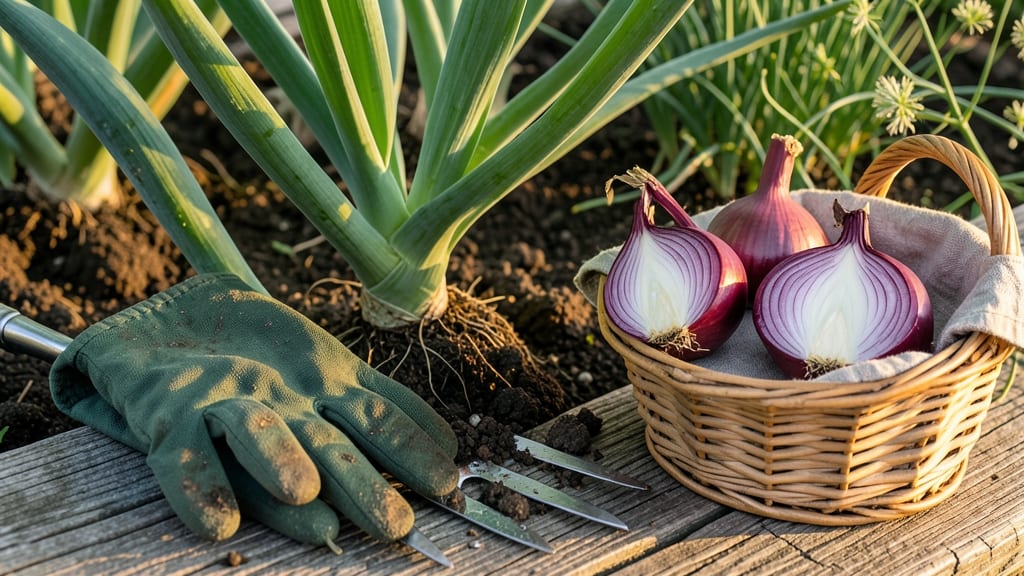
Knowing when to harvest red onions 🧅 is all about reading the plant’s cues—size, color, and texture—before the flavor peaks and the bulbs bolt.
Picture this: you’ve nurtured your red onions all season, only to pull them too early and end up with tiny, watery bulbs, or wait too long and watch them turn bitter and papery.
The difference between a perfect harvest and a wasted crop often comes down to spotting just the right moment.
In this guide, I’ll walk you through the three key signs that your red onions are ready—from the way the tops yellow to how the neck tightens—and how to adjust for your climate to avoid common mistakes.
You’ll also discover how to test for flavor before harvesting, what happens if you’re off by a week, and the best way to store your onions so they stay fresh for months.
Let’s make sure your hard work pays off with bulbs that are bold, sweet, and ready to use.


3 Visual signs your red onions are ready for harvest (before they bolt)
Harvesting red onions at the right moment transforms your garden into a flavor powerhouse. But timing is everything—wait too long, and you risk bitter bulbs or wasted effort as your plants bolt prematurely. The key lies in three visual cues that reveal when your onions have reached peak ripeness.
These signs ensure you harvest at the sweet spot between underripe mildness and overripe bitterness, preserving that signature crunch and bold flavor.
First, let’s address the most common mistake: assuming all onions mature at the same rate. In reality, red onions develop at different speeds depending on your climate zone, soil conditions, and even the specific variety you’re growing.
For example, shorter-day varieties like ‘Red Creole’ mature faster in cooler climates, while longer-day types like ‘Red Baron’ may take weeks longer in warm regions. Paying attention to these physical maturity signals trumps guessing based on days since planting.
🌱 Numbered Highlights: 3 Visual Signs Your Red Onions Are Ready
- 1. Leaf Color Shift: Tops turn straw-colored and flatten (not just yellow-green).
- 2. Bulb Size: Diameter reaches 1–2 inches with firm texture.
- 3. Neck Tightening: Stem shrinks and forms a papery sheath around the bulb.
💡 Pro Tip: Gently lift one onion to check—if the bulb is plump and dry-skinned, it’s ready!
Let’s break down the first sign: leaf color. When your red onion tops transition from vibrant green to a straw-yellow hue, it’s nature’s way of saying, “Time to harvest!” This color change signals that the photosynthesis process has shifted from leaf growth to bulb maturation.
Ignore this cue, and your onions may bolt (send up a flower stalk), diverting energy away from bulb development. In my garden, I mark this moment by tying a red ribbon around the plants to remind myself to check them daily.
The second visual clue is bulb size. Aim for onions that measure 1–2 inches in diameter—any smaller, and they’ll lack the bold flavor and storage potential you crave. To test, gently dig around the base of one plant and expose the bulb.
If it feels firm and the skin has turned papery (like onion paper), it’s ready. Pro tip: Use a ruler to measure bulbs—this eliminates guesswork and ensures consistency across your harvest. Overripe onions, on the other hand, often split open or develop soft spots, ruining their texture.
Here’s where many gardeners trip up: confusing neck thickness with overmaturity. The neck (the stem connecting the bulb to the leaves) should tighten and form a noticeable constriction just above the bulb. This is your third and final sign.
When the neck shrinks, it means the bulb has stopped growing upward and is now focused on flavor development. In my experience, this is the most reliable indicator—especially in hot climates, where onions can mature faster.
If the neck remains thick or the leaves stay green, hold off on harvesting.
But what if your onions show these signs, yet you’re still unsure? Try the soil trick: Gently dig up one onion and check its root system. Mature roots will be white and woody, while immature roots stay green and fibrous.
This simple test gives you a 100% accurate read on readiness. I’ve used this method for years, and it’s saved me from harvesting underripe onions that lacked the bold crunch I love in salads and sandwiches.
Timing your harvest correctly also depends on your climate zone. In cooler regions (USDA Zones 3–5), aim to harvest red onions in late summer before the first frost. In warmer zones (Zones 7–10), you can extend harvest into early fall.
Miss the window, and frost can turn your onions mushy or cause them to sprout. To beat the clock, I always plant a second crop in early summer for a fall harvest, ensuring a steady supply of fresh onions.
One final tip: Harvest in the morning when temperatures are cool. This preserves the crisp texture and flavor intensity of your onions. After harvesting, let them cure in the sun for 1–2 hours to toughen the skins, then braid or store them in a dry, dark place.
Proper curing extends shelf life from 2–3 weeks (fresh) to 3–4 months (cured). Trust me, the difference in flavor is night and day!
Mastering these three visual signs will turn you into a red onion harvesting pro. No more bitter surprises or wasted effort—just perfectly timed, flavor-packed bulbs ready for your kitchen.
Next time you’re checking your garden, look for these cues, and you’ll know exactly when to grab your pruners and celebrate a harvest well done. 🧅
How to test red onion flavor before harvesting (the simple soil trick)
When your red onions reach 105 days of growth, they’re technically mature—but that doesn’t mean they’re flavor-ready. The only way to guarantee sweet, pungent bulbs is to test one early. I’ve dug up dozens of onions this way, and it’s saved me from bitter harvests every time.
Here’s my foolproof method: gently loosen the soil around one plant and pull it up by the base. If the bulb is 1-2 inches wide with a firm, papery skin, it’s perfect. If it’s still green and soft, wait 2-3 weeks.
This trick works best in cool-season climates (USDA Zones 3-7), where onions mature slower. In warmer zones (8+), test earlier—heat accelerates growth, and bulbs can bolt before reaching peak sweetness.
Pro tip: Test onions in the morning after watering—the soil will be easier to work with, and you’ll avoid disturbing the roots of nearby plants.
- Dig 1 onion when tops yellow but aren’t fully flopped.
- Check for firm, dry neck—this means flavor is peaking.
- If skin is green and soft, wait 1-2 weeks.
- In hot climates, test 10-14 days earlier to avoid bolting.
✅ Why it works: The soil test reveals internal maturity before external signs appear.
Climate plays a huge role in timing. In cool spring plantings (like my Zone 5 garden), I test onions in late June—just as days start lengthening. For fall plantings, test in October before the first frost.
If you’re in a tropical zone, like Florida, test onions in September to beat the heat. Remember: onions grown in shorter daylight (like fall) develop sweeter flavors, while long summer days can make them sharp and pungent.
Once you’ve confirmed readiness, harvest on a dry, sunny day to let onions cure properly. Use a sharp knife or garden fork to lift bulbs—never pull by the tops, or you’ll damage the neck.
After harvesting, let onions dry in the sun for 3-5 days to develop their papery skin, which extends storage life. If you’re in a humid climate, spread them out on a wire rack to prevent rot.
Here’s the golden rule I follow: if your test onion has a tight neck and a bulb that’s firm but not rock-hard, it’s time to harvest. Overripe onions (with loose necks) lose flavor and store poorly, while underripe ones (still green-skinned) won’t keep well.
By testing early, you’ll avoid both pitfalls and end up with onions that are sweet, crisp, and perfect for storage.
Pro move: Label your onion beds by planting date so you can track growth. I use colored stakes (red for spring, blue for fall) to stay organized. This way, I know exactly when to test each batch.
Whether you’re growing short-day varieties (like ‘Red Creole’) or long-day types (like ‘Sweet Red'), this method guarantees you’ll harvest at peak flavor—no guesswork needed.