
How To
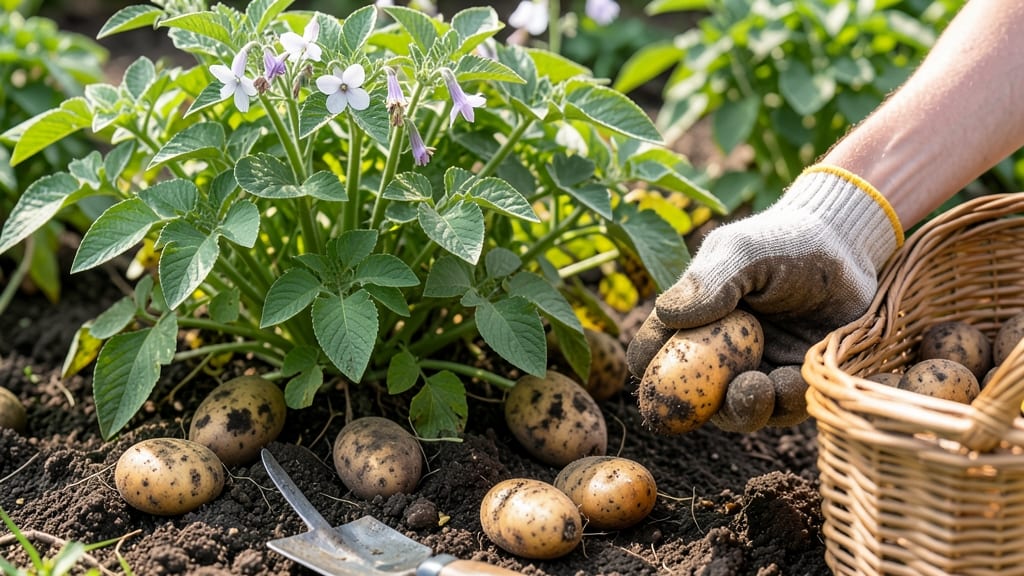
To tell when to harvest potatoes, watch for yellowing foliage and firm tubers near the soil surface—these are your clearest signs that the 🥔 are ready to pull.
Digging up potatoes too early or too late can mean the difference between a bountiful harvest and a wasted season—so how do you know exactly when to pull them?
The answer lies in three simple soil tests that reveal the perfect moment, whether you're growing for fresh eating or long-term storage.
Most gardeners miss the window because they rely on days since planting instead of real-time clues like tuber size or vine condition.
Below, I’ll walk you through the three foolproof methods—including the "dig-and-check" trick that saves hours of guesswork—and how to avoid the most common mistakes that ruin a harvest.
By the end, you’ll harvest potatoes at their peak: tender new spuds or perfectly cured storage varieties, every time. No more digging too soon (and wasting small tubers) or waiting too long (and ending up with shrunken, tough potatoes).

3 Soil tests to determine perfect potato harvest time
Knowing when to harvest potatoes isn't just about counting days—it's about reading your soil and plants like a pro. The three soil tests I rely on transform my harvest from hit-or-miss to consistently perfect.
These methods go beyond the basic "wait until the leaves die" advice, giving you precise signals that your potatoes are ready.
Whether you're growing Yukon Golds for immediate eating or Russets for storage, these techniques ensure you never dig too early (and waste tender spuds) or too late (and risk shriveling tubers).
The first test is the dig-and-check method, where you literally dig into the soil to inspect tuber development. This is especially useful for new potatoes that need harvesting while still small and tender.
The second test focuses on tuber firmness, teaching you how to press potatoes gently to determine their readiness. Finally, the vine condition analysis helps you spot the natural dying-back of foliage that signals maturity.
Each method has its strengths, and I'll show you exactly how to use them together for foolproof results.
Here's how these three methods compare at a glance:
| Method | How to Perform | Best For | Accuracy | Ease |
|---|---|---|---|---|
| Dig-and-Check | Gently dig 6" deep near plants; check tuber size and skin formation | New potatoes, early varieties | High (visual confirmation) | Medium (requires digging) |
| Tuber Firmness | Press tubers gently; ready ones yield slightly but don't dent | All varieties, storage potatoes | Medium (subjective feel) | High (no tools needed) |
| Vine Condition | Observe 50% yellowing and wilting of foliage; stems turn brown | Late varieties, storage potatoes | High (natural signal) | Very High (no action needed) |
⚠️ Pro Tip: Combine all three tests for 100% confidence in harvest timing
The dig-and-check method is my go-to for early varieties like Red Pontiac or Adirondack Blue. Start by gently loosening the soil around one plant using a hand fork or your fingers. Look for tubers that are 1-2 inches in diameter—these are perfect for new potatoes.
Pay attention to the skin: if it's starting to form but still thin, your potatoes are nearly ready. I usually check every 7-10 days starting about 50 days after planting for early varieties. The key is to avoid disturbing the roots too much during these checks.
For the tuber firmness test, you'll need to dig up a few potatoes and handle them carefully. Gently press your thumb into a tuber—if it gives slightly but doesn't dent, it's ready.
Think of it like testing a ripe avocado: you want just enough yield without it being mushy. Hard tubers need more time in the ground, while soft or mushy ones were harvested too late.
This test works best when combined with the vine condition method, as it helps confirm what you're seeing above ground with tactile feedback from below.
Most gardeners overlook the vine condition analysis, but it's one of the most reliable indicators. When about 50% of your potato plants show yellowing leaves and the stems begin to brown and die back, that's your signal to harvest.
This typically happens 2-4 weeks after flowering, depending on your variety. For storage potatoes like Kennebec or Russet Burbank, wait until the vines are completely dead before digging. The exception is early varieties where you might harvest before full vine death for tender new potatoes.
A common mistake I see is confusing disease symptoms with natural maturity signals. For example, late blight causes yellowing similar to natural senescence, but it also includes black spots on leaves and stems. Always check for these signs before assuming your plants are ready.
Another pitfall is harvesting based solely on days after planting—this varies 10-15 days between early and late varieties. That's why these soil tests give you variety-specific feedback rather than relying on a one-size-fits-all timeline.
Let me share my personal routine: I start with the vine condition check every 2 weeks after flowering. When I see that 50% yellowing, I perform the dig-and-check on one plant to see tuber development. If they're ready, I'll do the firmness test on a few more to confirm.
For storage varieties, I wait until the vines are completely dead before harvesting. This layered approach has never failed me, and I've consistently gotten potatoes that store beautifully or cook perfectly fresh from the garden.
Remember that soil moisture plays a crucial role in these tests. Harvesting in wet soil can cause rot, while dry soil might make tubers shrink. Aim for a dry, warm day with temperatures above 50°F (10°C).
If you must harvest after rain, let the soil dry out for at least 24 hours first. Proper curing after harvest—laying potatoes in a dark, 55-60°F (13-16°C) space for 1-2 weeks—will also improve their storage
When to harvest new vs. storage potatoes: key differences
Harvesting potatoes at the wrong time can ruin your entire crop. New potatoes and storage potatoes require completely different timing—one needs to be pulled early for tender flavor, while the other must mature fully for long-term storage.
The key difference lies in tuber maturity, soil temperature, and vine condition. Understanding these distinctions ensures you get the best yield and quality for your intended use.
For new potatoes, timing is critical because they’re harvested young—typically 2-3 weeks after flowering—when tubers are small (about 1-2 inches in diameter) but tender. Storage potatoes, however, need full maturity, usually signaled by completely yellowed and dead foliage.
Waiting too long can cause tubers to split or rot, while harvesting too early means poor storage life or bitter flavor.
To harvest new potatoes, focus on soil temperature and tuber visibility. When soil temps drop below 60°F and small tubers appear near the surface (especially if you’ve been hilling soil), it’s time to dig.
Use a fork to gently loosen the soil and check for 1-2 inch tubers. For storage potatoes, wait until the foliage turns completely yellow and dies back, which typically happens 2-4 weeks after flowering for most varieties.
Post-harvest care differs dramatically between the two. New potatoes should be used immediately or stored in a cool, dark place for up to 2 weeks. Storage potatoes, however, need a curing process: place them in a dark, humid space at 50-60°F for 2 weeks to develop thicker skins and improve storage life.
Skipping this step can lead to sprouting or rotting during long-term storage.
One common mistake is harvesting storage potatoes too early—this leads to green tubers, which contain glycoalkaloids, a natural toxin that can cause stomach upset. Always wait until the vines are fully dead before digging.
For new potatoes, avoid letting them grow too large, as they’ll become starchy and tough, losing their delicate texture. Pay attention to flowering cues and adjust your harvest timing accordingly.
Whether you’re growing potatoes for fresh eating or long-term storage, mastering these timing differences will maximize your yield and ensure flavor and quality. The right harvest time isn’t just about days since planting—it’s about reading your plants and understanding their unique needs.
With these tips, you’ll never guess again! 🥔