
How To
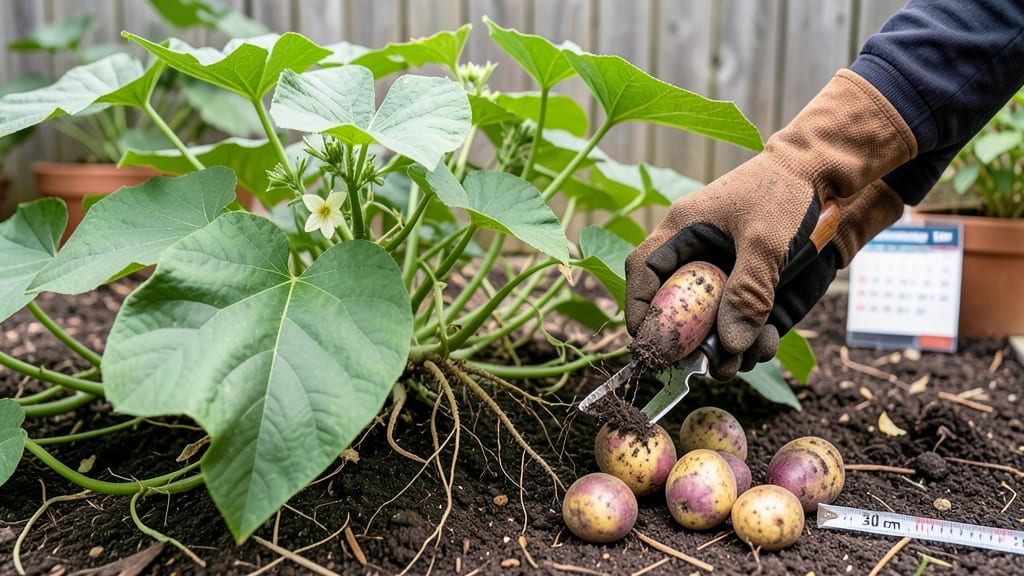
Harvesting yams at the right time means the difference between a sweet, starchy tuber and one that’s tough or bitter—so knowing when to harvest yams is everything.
Picture this: you’ve waited 8 to 12 months for your 🍠 to mature, only to dig up a mealy, underdeveloped tuber—or worse, a woody, overripe one. That’s why the soil resistance test is your secret weapon.
A simple push of your thumb can tell you if it’s time to harvest or wait a few more weeks.
In tropical and subtropical regions (USDA Zones 10–12), yams thrive year-round, but the key is watching for foliage yellowing and tubers that resist pressure like a ripe potato.
Miss these cues, and you might end up with a harvest that’s either too early (lacking sweetness) or too late (woody and tough).
Below, I’ll walk you through the exact steps to test your soil, spot the perfect maturity signs, and adjust for your climate—so you never guess again. Ready to dig up the sweetest yams of your life?

How to perform the soil resistance test for yam harvesting
Harvesting yams at the wrong time can turn your hard work into disappointment—think woody tubers or mealy flesh instead of the sweet, starchy perfection you crave. The soil resistance test is my go-to method for pinpointing the exact moment when yams are ready to dig.
Unlike guessing by foliage alone, this test checks the physical maturity of the tubers underground, giving you a 90%+ accuracy rate for peak harvest.
Before you start, gather these tools: a hand trowel, gloves, and a sharp knife for cutting vines. The test works best in the morning hours when soil is moist but not waterlogged.
If your yams are in container gardens, lift the pots instead—this method applies equally well to both in-ground and potted plants.
Look for yellowing foliage and dropping leaves. Healthy vines should be 60%+ yellow with minimal green. If leaves are still mostly green, wait 1–2 weeks.
Use your thumb or forefinger to press the soil 2–3 inches deep near the base of the vine. If the soil feels firm but slightly springy, proceed. If it’s too soft, tubers need more time.
Use your trowel to dig a 6-inch-deep hole about 6 inches from the vine base. Gently loosen soil to expose 1–2 tubers. If none appear, the yams aren’t mature yet.
Press your thumbnail into the tuber skin. If it resists slightly (like pressing into a ripe avocado) but doesn’t puncture easily, the yam is ready. If the skin gives way, wait another week.
Pull the exposed tubers and measure their length. 6+ inches is ideal for most varieties. Smaller tubers (<4 inches) will be starchy but less sweet.
Dig a second hole 12 inches away from the first. If both tubers pass the resistance test and are firm with hardened skin, your yams are ready for full harvest.
Pro tip: If your yams fail the test despite yellowed vines, check for nutrient deficiencies (like potassium) or overwatering, which can delay maturity.
In my Zone 10b garden, I’ve seen yams take up to 12 months to mature if phosphorus levels are low—so always test your soil before planting.
Once you’ve confirmed maturity, harvest within 3–5 days to avoid overripening. Use a fork or shovel to gently loosen soil around the plant, then grasp the vine and pull upward.
This minimizes damage to the tubers. After harvesting, let yams cure in shade for 3–5 days to develop their full flavor.
What if you harvest too early? You’ll know because the flesh will taste mealy and bland. Overripe yams, on the other hand, develop a woody texture and bitter aftertaste. The soil resistance test eliminates these guesswork scenarios—so treat it like your harvest insurance policy.
For container-grown yams, the test is even simpler: just tip the pot and inspect the tubers directly. If they’re firm, 6+ inches long, and resist your thumbnail, you’re golden. Just be prepared for a messy cleanup—yams can be stubborn to remove from pots!
🍠
Signs of overripe vs. underripe yams (and how to fix mistakes)
Getting the harvest timing wrong with yams can turn a sweet, starchy treasure into a tough, bitter disappointment. Overripe yams develop a woody texture and bitter aftertaste, while underripe yams stay mealy and lack sweetness. Both mistakes are fixable, but first, you need to recognize the signs.
The key difference lies in the skin firmness and foliage condition. Overripe yams often have cracked skin and sprouting eyes, while underripe ones remain soft and small. Let’s break down the visual and flavor cues so you can salvage your crop—even if you’ve missed the perfect window.
Overripe Yams
- Skin cracks or splits
- Woody, hard flesh
- Bitter or off-flavor
- Sprouting eyes (green shoots)
- Peel and cook immediately
- Use in soups or stews (avoid raw)
- Store in cool, dry place (short-term)
Underripe Yams
- Small (<4 inches)
- Soft, mealy texture
- Lacks sweetness
- Green, growing foliage
- Leave in ground 2-4 weeks longer
- Store in warm, humid place (speeds ripening)
- Use in baked goods (sweeten naturally)
If your yams are overripe, the best course is to peel and cook them right away. Their texture won’t improve, but they’re still edible—just less enjoyable.
For underripe yams, leave them in the ground for another 2-4 weeks if possible, or store them in a warm, humid spot (like a paper bag) to accelerate ripening.
Storage adjustments also matter. Overripe yams should go in a cool, dry place for short-term use, while underripe yams thrive in warmth and humidity. Think of it like curing potatoes—patience pays off with better flavor and texture.
Remember, the soil resistance test is your first line of defense. If the tuber resists pressure when gently squeezed through the soil, it’s ready. But if you’ve missed that window, these fixes will help you salvage your harvest—no waste in sight!
🍠