
How To
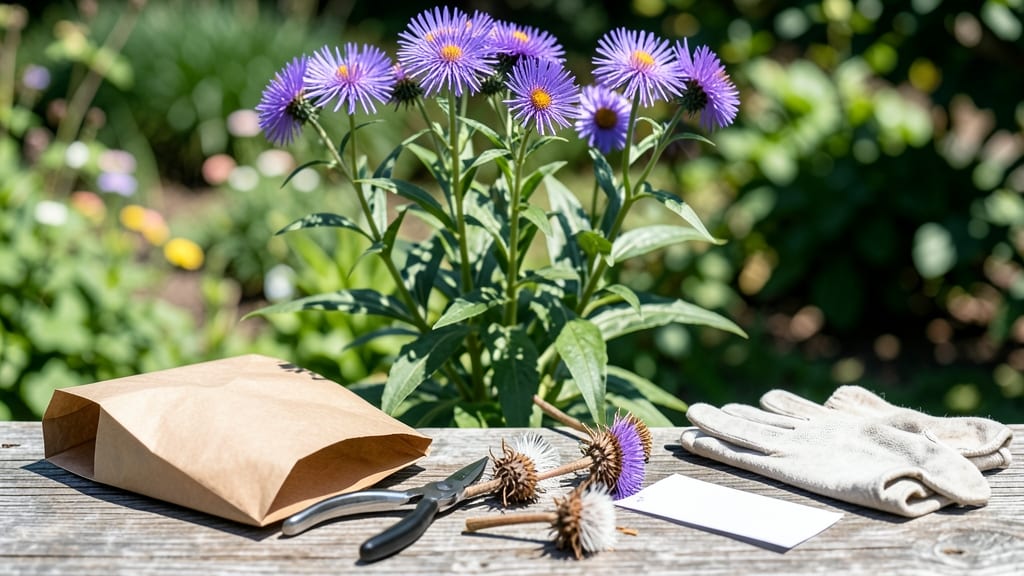
To harvest aster seeds, wait until the 🌸 flower heads turn brown and papery—then collect them before they scatter in the breeze.
Those fluffy brown aster seed heads aren’t just pretty—they’re packed with potential for next year’s garden. But timing and technique make all the difference between successful seed saving and wasted effort.
If you miss the window, the wind will carry them away, leaving you with nothing to replant. The key is knowing when the seed heads are fully dry but still intact, so you can preserve them properly for storage.
Below, I’ll walk you through the exact steps to harvest, dry, and store aster seeds—plus how to test their viability for planting next season.

When to harvest aster seeds: identifying the perfect ripeness stage
Timing is everything when harvesting aster seeds. Miss the window, and those fluffy seed heads will scatter across your garden like tiny brown confetti.
The key is catching them at the perfect ripeness stage, when they're dry enough to harvest but haven't yet released their seeds to the wind. For most garden asters, this typically occurs in late summer to early fall, but regional climates can shift this window by weeks.
Native asters often bloom later than their cultivated cousins, so fall-blooming varieties may need harvesting as late as October in cooler zones. In warmer climates, you might start seeing ripe seed heads as early as mid-August.
The main goal is to collect seeds before they self-sow, which can lead to unwanted volunteer plants popping up everywhere next season.
Start by checking your aster seed heads for three key indicators of ripeness. First, look for the color change from green to a uniform brown. The seed heads should appear completely dry and papery to the touch.
Second, give them a gentle shake - if you hear a faint rattling sound, that means the seeds inside are ready for collection. Finally, the flower petals should have completely fallen away, leaving just the seed head structure.
For late-summer bloomers, like New England aster or smooth aster, you'll want to monitor them closely starting in August. These varieties often mature faster than their fall counterparts. If you're growing fall-blooming asters, such as Michaelmas daisies, wait until September or early October before harvesting.
The exact timing depends on your specific variety and local climate, but these general guidelines will help you avoid common mistakes.
One common mistake gardeners make is waiting too long. By the time the seed heads look completely dry and brittle, they may have already released many of their seeds. To prevent this, I recommend harvesting 2-3 days before the seed heads appear fully dry.
This gives you a buffer while still ensuring good seed viability. For native asters, which often have smaller seeds, you might need to harvest even earlier to capture the maximum yield.
Regional climate plays a huge role in timing. In cooler northern climates, where frost can arrive early, you might need to harvest aster seeds by mid-October.
I've found that in USDA Zone 5, for example, native New England asters often need harvesting by the end of September to avoid frost damage.
Conversely, in warmer southern zones, you might start seeing ripe seed heads as early as July, especially for heat-tolerant varieties like Italian aster.
Pay special attention to the seed head structure. Mature aster seed heads should be completely dry and should break apart easily when handled gently. If you notice any green stems or moist areas, the seeds aren't ready yet.
For tall aster varieties**, like the Alpine aster, you might need to harvest from the bottom of the plant first, as these seed heads often mature from the bottom up. This staggered maturity is normal and simply means you'll need to make multiple passes through your garden.
Remember that aster seeds have excellent viability when stored properly, so don't rush the harvesting process. Taking the time to identify the perfect ripeness stage will pay off with higher germination rates next spring.
Once you've identified your ripe seed heads, the next step is to collect them carefully to avoid damaging the delicate seeds inside. A simple paper bag works well for this purpose, allowing you to gently shake the seed heads and collect the seeds without losing them to the wind.
Step-by-step aster seed harvesting method for maximum yield
Harvesting aster seeds at the right moment ensures high-quality seeds for next year’s garden. The key is acting quickly once the seed heads turn brown and dry—before they release their seeds into the wind.
I’ve perfected this process over years of growing both garden asters and native varieties, and I’ll share my foolproof method to maximize your yield.
Timing is everything with aster seed harvesting. If you wait too long, the seeds will scatter, leaving you with nothing to save. But harvest too early, and the seeds won’t be fully mature.
The ideal moment is when the seed heads are fully brown, dry to the touch, and make a rattling sound when shaken. This usually happens in late summer to early fall, depending on your climate and the specific aster variety.
- Step 1: Gather Your Tools
You’ll need clean pruning shears, a paper bag or envelope for each variety, and a labeling marker. Avoid plastic bags—they trap moisture and can cause mold. I also keep a small tweezers set handy for stubborn seed heads. - Step 2: Identify Mature Seed Heads
Look for fully brown, dry seed heads with no remaining petals. Gently shake them—if seeds rattle inside, they’re ready. Skip any heads that are still green or damp, as they won’t produce viable seeds. - Step 3: Harvest the Seed Heads
Use your pruning shears to snip the entire seed head, leaving a short stem. Place each head in its own paper bag immediately to prevent cross-contamination between varieties. Label each bag with the aster type and harvest date. - Step 4: Dry the Seed Heads
Store the bags in a cool, dry, and well-ventilated space for 1-2 weeks. Avoid direct sunlight, which can over-dry the seeds. Check weekly to ensure no mold develops—discard any bags that feel damp or smell musty. - Step 5: Extract the Seeds
Once completely dry, gently crush the seed heads over a clean sheet of paper or into a bowl. Use your fingers or a fine mesh sieve to separate the seeds from chaff. Store the clean seeds in a paper envelope or airtight container. - Step 6: Store for Next Season
Keep seeds in a cool, dark place (like a fridge or seed vault) with a silica gel packet to absorb moisture. Label each container with the variety name, harvest year, and germination date. Most aster seeds remain viable for 1-2 years if stored properly.
If you’re dealing with stubborn seed heads that refuse to release their seeds, try placing them in a paper bag and gently shaking or rolling them. The movement often encourages the seeds to loosen.
For native aster varieties, which may have tougher seed cases, a brief soak in warm water for 24 hours can help soften the outer layer without damaging the seeds.
One common mistake is harvesting seeds too late, only to find they’ve already scattered across your garden. To avoid this, I recommend checking your aster plants weekly once the seed heads form. If you’re growing multiple varieties, harvest them one at a time to prevent accidental mixing.
With practice, you’ll develop an eye for the perfect moment to collect seeds, ensuring a bountiful harvest year after year.
Once you’ve mastered the harvest, you’ll have a stash of aster seeds ready for next season’s garden. Just remember: the fresher the seeds, the higher the germination rate.
Store them properly, and you’ll be well on your way to growing a vibrant, homegrown aster display for years to come. Happy harvesting! 🌸