
How To
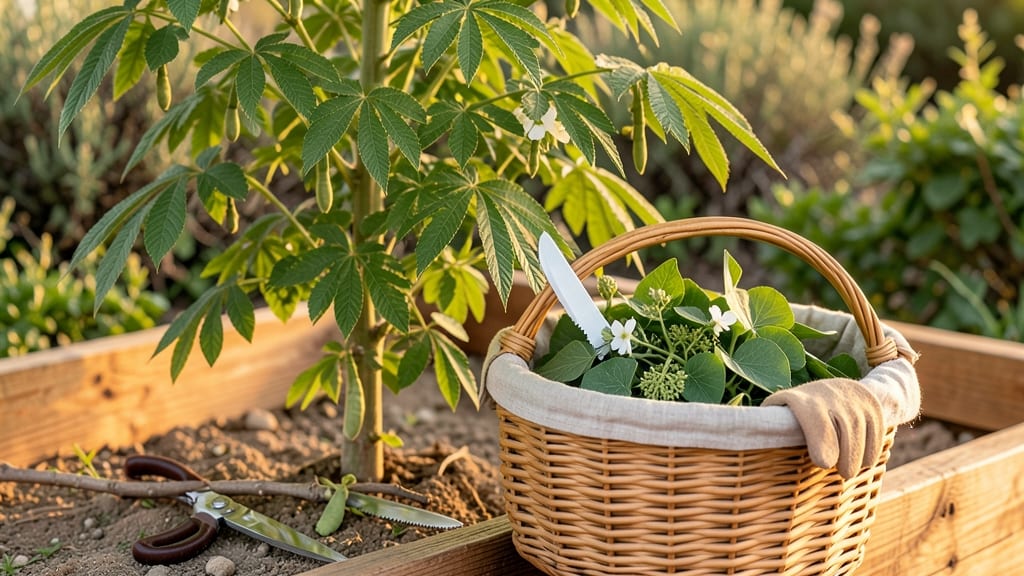
To harvest moringa leaves at their most nutritious, focus on young, tender growth between 3 and 6 inches—this is when they pack the highest levels of vitamins and minerals.
You might think any leaf will do, but timing and technique make all the difference. Moringa leaves pack 7x more vitamin C than oranges and 4x more calcium than milk, but only if you pick them at the right stage.
Harvest too late, and you lose potency; too early, and the plant struggles to recover.
In this guide, I’ll walk you through the exact steps to identify the perfect leaves, the best tools to use, and how often you can harvest without harming your plant. Whether you’re growing moringa 🌱 for health or profit, these methods ensure you get the most from every harvest.
You’ll also learn how to prune for regrowth, store leaves for long-term use, and even whether (and how) to harvest flowers or seeds. By the end, you’ll have a system that keeps your moringa thriving and your harvests abundant all year.

Optimal harvesting time for moringa leaves by growth stage
Timing your moringa leaf harvest correctly ensures maximum nutrient density and plant health. Young leaves—3-6 inches long—contain the highest levels of vitamin C, calcium, and antioxidants.
Harvesting too early or too late reduces potency and stresses the plant. Understanding your moringa's growth stages is key to balancing yield and nutrition.
Moringa leaves reach peak nutrition between 60-90 days after planting, but not all leaves are equal. The youngest, most tender leaves (near the tips of branches) pack the most nutrients. Mature leaves, while still edible, have lower nutrient levels and tougher textures.
I’ve found that spring and summer harvests produce the most vibrant, nutrient-rich leaves due to optimal sunlight and warmth.
Here’s how to identify the perfect harvest window using simple visual cues:
Sun exposure dramatically impacts harvest quality. Moringa leaves grown in full sun (6+ hours daily) develop higher nutrient levels than those in shade. If your plant is in partial shade, harvest slightly later in the season when leaves have had time to compensate.
I’ve noticed that morning harvests yield the freshest leaves, as evening heat can cause wilting and nutrient loss.
Seasonal variations also play a role. In tropical climates, moringa grows year-round, but spring and summer harvests are richest due to longer daylight. In subtropical zones, avoid harvesting during winter dormancy (leaves may turn yellow or drop).
Always check for soft stems and flexible branches—these are signs your moringa is ready for harvest.
Over-harvesting can stunt growth, so never remove more than 30% of leaves in a single session. Focus on the outermost leaves first, as these are the youngest and most nutrient-dense.
Prune strategically to encourage bushier growth and more harvests. I prune my moringa every 4-6 weeks during peak season to maintain a steady supply of tender leaves.
Pro tip: Use a sharp pair of pruning shears to avoid tearing leaves. Cut just above a leaf node to promote regrowth. This method keeps your plant healthy and ensures a continuous harvest throughout the growing season. Always sanitize your tools with rubbing alcohol to prevent disease spread.
If you’re growing moringa in containers, harvest slightly more frequently (every 3-4 weeks) since potted plants grow faster. Monitor soil moisture closely—underwatered plants produce tougher leaves with lower nutrient content. A deep watering the day before harvest ensures plump, hydrated leaves.
Remember, the younger the leaf, the higher the nutrient content. Don’t wait until leaves are fully mature, or you’ll miss out on moringa’s superfood potential. With the right timing, you can enjoy a year-round supply of nutrient-packed leaves while keeping your plant thriving.
Step-by-step harvesting techniques to preserve leaf quality
Harvesting moringa leaves at the right time ensures maximum nutrient retention while keeping your plant healthy. The key is to target young, tender leaves (3-6 inches long) that are dark green and glossy.
These leaves contain the highest levels of vitamin C, calcium, and antioxidants, but improper techniques can strip away nutrients or stress the plant.
Start by inspecting your moringa plant for ready-to-harvest signs: flexible stems that snap easily, vibrant color, and a soft texture. Avoid harvesting leaves that are woody or yellowing, as these indicate lower nutrient levels and potential stress.
The best time to harvest is in the early morning when leaves are hydrated and nutrient-dense.
⚠️ callout-warning
⚠️ Avoid These Harvesting Mistakes
- Over-pruning: Never remove more than 1/3 of leaves at once—this weakens the plant and reduces future yields.
- Dirty tools: Always use sterilized pruners or scissors to prevent disease transmission.
- Harvesting flowers/seeds: Removing flower buds reduces future seed production, which is vital for regrowth.
Moringa plants rely on flowering cycles to regenerate leaves—disrupt this, and you’ll see stunted growth.
For hand-picking leaves, gently twist or pinch the stem just above a leaf node (where the leaf meets the stem). This encourages new growth from that point. Use your fingers or clean scissors—avoid tearing leaves, which damages the plant.
If pruning larger branches, use sharp, sterilized pruners and cut at a 45-degree angle to promote faster healing.
After harvesting, wash leaves immediately in cool water to remove dirt and pests. Pat them dry with a clean towel or paper towels to prevent moisture buildup, which can lead to mold or bacterial growth.
Spread leaves on a drying rack or clean towel in a shady, well-ventilated area for 2-4 hours, or until completely dry. Avoid direct sunlight, which can degrade nutrients like vitamin C.
Store dried moringa leaves in an airtight container away from light and heat. For short-term use (up to 2 weeks), refrigerate in a sealed bag. For long-term storage (up to 6 months), freeze leaves in ice cube trays or vacuum-sealed bags to preserve their nutritional potency.
Label containers with the harvest date to track freshness.
To encourage regrowth, water your plant deeply after harvesting and apply a balanced fertilizer (10-10-10 NPK) every 4-6 weeks. Avoid heavy fertilizers immediately post-harvest, as new leaves need time to replenish nutrients without stress.
With proper care, your moringa tree can produce year-round harvests while maintaining its nutrient powerhouse status.