
How To
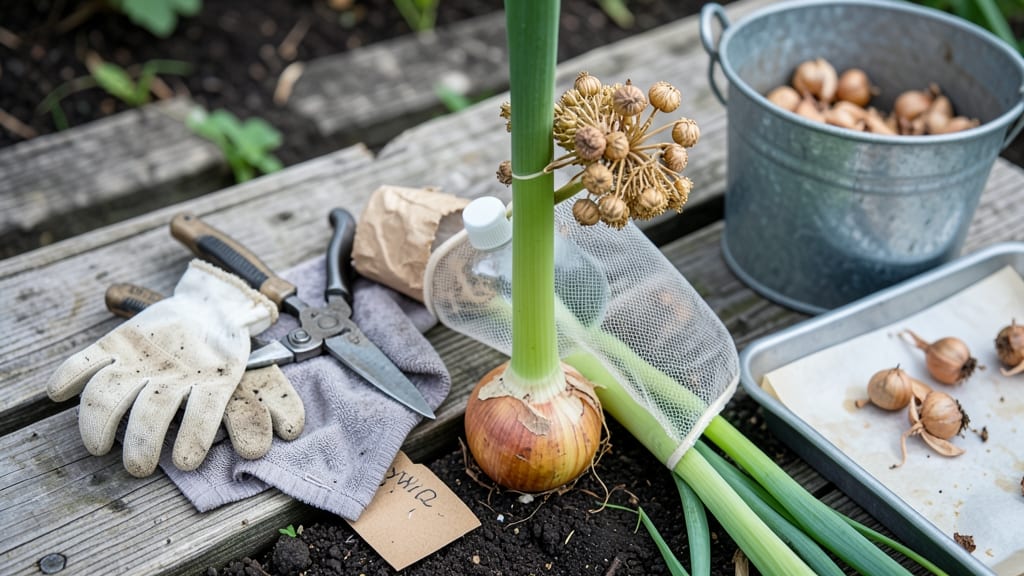
Harvesting onion seeds from mature umbels is your chance to save money and grow next year’s crop from home — but timing and technique make all the difference.
If you’ve ever watched those tall flower stalks rise from your 🧅 plants, you know the moment they turn brown and papery is your cue. Miss it, and the seeds scatter or shrivel; rush it, and they won’t store well.
The key is learning to read the signs: when the stalks rattle with seeds and the pods start splitting open.
In this guide, I’ll walk you through the exact steps to cut, dry, and store your seeds for maximum viability, plus how to troubleshoot common mistakes like premature drying or pest interference. No more wasted harvests!
By the end, you’ll know when to act, how to handle the umbels properly, and where to store them so they’re ready to plant next spring. Let’s turn those brown stalks into next year’s garden.

When and how to identify mature onion seed umbels for harvest
Harvesting onion seeds is all about timing—specifically, recognizing when those umbels (the flower clusters) reach peak maturity. The moment you see brown, papery stalks and hear seeds rattling inside, you’ve hit the sweet spot.
Miss this window, and your seeds may scatter or lose viability. Let’s break down the visual and tactile cues to ensure you harvest at the perfect moment.
First, focus on the color transformation of the umbels. When they shift from green to dull brown or tan, this signals the seeds are nearly ready. The stalks should feel dry and crispy to the touch, almost like brittle paper.
If you gently shake the umbel and hear a faint rattling sound, this confirms the seeds inside are mature and ready for collection.
Don’t wait until the umbels turn completely white or grayish, as this often means the seeds have already started to scatter. The ideal moment is when the stalks are fully brown but still intact.
This phase typically occurs in late summer to early fall, depending on your climate and the onion variety you’re growing.
Here’s a quick reference to help you spot maturity:
| Stage | Visual Cues | Tactile Cues | Action |
|---|---|---|---|
| Early Maturity | Green umbels with some brown tips | Stalks still firm | Monitor daily |
| Peak Maturity | Fully brown, papery stalks | Dry, crispy, rattles when shaken | Harvest immediately |
| Over-Mature | White/gray, splitting open | Seeds scatter easily | Too late; collect any remaining seeds |
If your umbels are drying too quickly due to hot, dry weather, consider covering them with lightweight shade cloth to slow the process. This prevents premature drying, which can reduce seed quality.
Conversely, if humidity is high, the stalks may stay green longer, delaying maturity. In such cases, ensure good air circulation around the plants to encourage drying.
Pests like onion flies or aphids can also disrupt seed development. If you notice signs of infestation—such as chewed leaves or sticky residue—address the issue immediately with neem oil or insecticidal soap.
Once the umbels are mature, pests are less likely to target them, but early intervention is key to protecting your seed crop.
Another critical cue is the leaf die-back. As the onion plant matures, its leaves will turn yellow and wilt completely. This is a natural sign that the plant is redirecting its energy to seed production.
Combine this with the brown umbels and rattling seeds, and you’ve got a foolproof indicator that it’s harvest time.
For long-day onion varieties, which require more sunlight to flower, maturity may take slightly longer. Keep an eye on the seed stalk height, which should reach 12-18 inches before harvesting.
Short-day varieties, on the other hand, mature faster and may be ready in as little as 60-90 days after flowering.
Once you’ve confirmed maturity, act quickly. Use a pair of clean, sharp scissors to cut the umbels just above the bulb. Avoid pulling or twisting, as this can damage the stalk and cause seeds to drop prematurely.
Place the cut umbels in a paper bag or breathable mesh bag to allow airflow during drying.
If you’re unsure whether your seeds are fully mature, perform a simple float test. Drop a few seeds into a glass of water: mature seeds will sink, while immature ones will float. This quick check can save you from storing underdeveloped seeds that won’t germinate well.
Timing your harvest correctly ensures you’ll have viable, high-quality seeds for next year’s garden. Keep an eye on those umbels, and you’ll never miss the perfect moment again! 🌱
Step-by-step guide to harvesting, drying, and storing onion seeds
Once your onion plants develop those iconic tall flower stalks (called umbels), you’re just weeks away from harvesting seeds. But rushing the process can mean poor-quality seeds.
The key is patience—wait until the umbels turn completely brown and the seed pods rattle when shaken. This ensures maximum seed viability for next year’s garden.
Harvesting at the right moment isn’t just about color—it’s also about tactile feedback. Mature seeds should feel dry and brittle, not damp or squishy. If you miss this window, seeds may scatter before you can collect them, or they’ll lose their germination potential.
Let’s walk through the exact steps to preserve your hard-earned harvest.
How to Harvest Onion Seeds
-
Step 1: Wait for Full Maturity
Harvest only when umbels are fully brown and seed pods rattle when gently shaken. This usually happens in late summer to early fall, about 2 years after planting.
-
Step 2: Cut the Umbels
Use clean pruners or scissors to cut the entire flower stalk about 2 inches below the umbel. Avoid damaging the seed pods—they’re fragile at this stage.
-
Step 3: Bundle for Drying
Gather 3-5 stalks and tie them together with twine or rubber bands. Hang them upside down in a dry, well-ventilated area (like a garage or shed) away from direct sunlight.
-
Step 4: Dry Completely
Let the umbels dry for 2-3 weeks until the seed pods are completely dry and crisp to the touch. If humidity is high, spread them on paper towels in a single layer.
-
Step 5: Remove Seeds
Once dry, gently rub the umbels between your hands or use a paper bag to shake out the black seeds. Discard any empty or damaged pods.
-
Step 6: Store Properly
Place seeds in a paper envelope or airtight container with a silica gel packet to absorb moisture. Label with the variety name and harvest date.
-
Step 7: Test Viability
Before planting, test 10 seeds on damp paper towels. If 50%+ germinate in 7-10 days, your seeds are ready to use. Otherwise, store in the fridge for another year.
Drying methods matter—hanging umbels is traditional but works best in low-humidity climates. If your air feels damp, opt for a spread-out drying tray instead. This prevents mold growth and ensures seeds stay crisp and viable.
Store them in a cool, dark place (like a seed fridge) to extend their shelf life for up to 3-5 years.
Testing seed quality before planting saves time and frustration. A simple germination test on a damp paper towel reveals whether your seeds are worth sowing. If germination rates drop below 50%, consider replenishing your seed stock or trying a different variety next year. Fresh seeds always perform best!
Proper storage is non-negotiable—moisture and heat are the enemies of seed longevity. Use airtight containers with desiccant packets to keep humidity at bay. Label everything clearly, because misidentified seeds can lead to unexpected surprises in your garden next spring.