
How To
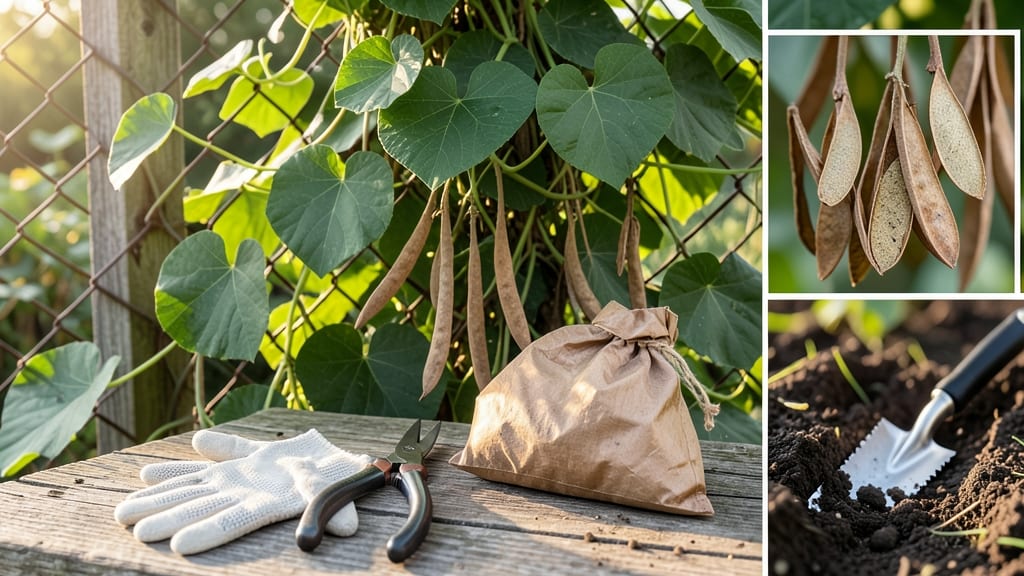
Harvesting moonflower seed pods at the right time ensures you save viable seeds for next season’s stunning 🌙 blooms.
If you’ve ever watched your moonflower vines fade after their nightly display, only to find the seed pods still green and firm, you know how easy it is to miss the window.
These delicate pods dry out and split open on their own schedule—usually in late summer to early fall—so timing is everything.
Look for pods that turn a deep brown and begin to crack naturally; that’s your cue to collect them before the seeds scatter. In USDA Zone 6a, this typically happens between August and September, but cooler weather can delay it.
Skipping this step means losing your chance to grow more of these enchanting vines.
Below, I’ll walk you through how to spot the perfect moment, gently harvest the seeds, and store them for planting. You’ll never miss another harvest again!

How to identify the perfect harvest time for moonflower seed pods
Moonflower seed pods (Ipomoea alba) transform from vibrant green to golden-brown as they mature, signaling the perfect time to harvest. Missing this window means losing viable seeds or dealing with pods that shatter before you can collect them.
The key lies in observing three critical visual cues: color changes, texture shifts, and natural splitting patterns. These indicators work together to confirm your pods are ready.
First, watch for the color transformation from bright green to a rich, papery brown. This shift happens gradually over 4-6 weeks after flowering, depending on your climate. In cooler regions, pods may take longer to mature, while warmer areas see faster drying.
The brown hue isn’t just cosmetic—it indicates the seeds inside have reached full viability and the pod’s moisture content has dropped to safe levels.
Next, focus on the texture of the pod walls. When mature, moonflower seed pods develop a dry, crisp texture that feels almost brittle. Gently press a pod between your fingers—if it crumbles slightly or separates at the seams, it’s ready.
Immature pods, however, remain firm and green, with a thicker, almost rubbery surface. This texture test is your best defense against harvesting too early, when seeds are still developing.
Here’s a quick reference to help you spot the perfect harvest moment:
| Pod Stage | Visual Cues | Texture | Action |
|---|---|---|---|
| Immature | Green, firm, no cracks | Thick, rubbery | Wait 2-4 weeks |
| Mature (Ready) | Brown, dry, slight cracks | Dry, brittle, splits easily | Harvest immediately |
| Overripe | Fully split, seeds scattered | Powdery, hollow | Seeds may lose viability |
Don’t overlook the natural splitting pattern of moonflower pods, which is your final green light. As pods mature, they begin to crack open along their seams, often with a faint popping sound. This is nature’s way of releasing seeds for dispersal, but it’s also your cue to act.
If you hear seeds rattling inside when you shake the pod, that’s another clear sign—it means the seeds are loose and ready for collection.
Environmental factors also play a role in timing. In humid climates, pods may take longer to dry, while arid regions see faster maturation. If rain is forecasted, harvest pods 24-48 hours before to avoid moisture-related spoilage.
Morning is the best time to check pods, as dew can mask their dryness and make them appear fresher than they are.
One common mistake is harvesting pods that are partially dry but still green. These seeds often fail to germinate because they haven’t fully matured. To test readiness, cut open a pod—if the seeds inside are plump and dark brown, they’re ready.
If they’re still pale or shriveled, wait another week. Patience here ensures you don’t waste time on non-viable seeds.
Regional variations matter too. In USDA Zone 9 or higher, moonflower pods may mature as early as late July, while in Zone 7 or cooler, you might not see ready pods until mid-September.
Always align your harvest with your local frost dates—if a hard frost is coming, prioritize harvesting even if pods aren’t fully split.
Pro tip: Place a white sheet or tray under the vine before pods start splitting. This makes it easy to spot fallen seeds and collect them without missing any. Moonflower seeds are lightweight and can scatter far, so this simple trick saves you from a messy cleanup later.
Just be sure to check your collection daily, as seeds can dry out quickly in the sun.
Finally, trust your instincts. If a pod feels lightweight and hollow when held, it’s likely overripe. The goal is to harvest when pods are dry but not yet shattered.
With practice, you’ll develop an eye for the perfect moment—turning what could be a frustrating hunt into a rewarding part of growing these magical vines. 🌙
Step-by-step guide to harvesting moonflower seeds without losing them
Harvesting moonflower seeds at the right time ensures you’ll have healthy, viable seeds for next season’s garden. The key is patience—wait until the pods split open naturally, which usually happens in late summer to early fall.
Rushing the process can damage seeds or prevent germination. I’ve learned the hard way that green, unripe pods won’t yield anything useful, so timing is everything.
Before you begin, gather your tools: a pair of clean pruning shears, a paper bag or envelope for collecting seeds, and a dry, shaded workspace. Avoid harvesting on wet days, as moisture can ruin your seeds.
The goal is to collect seeds gently, so handle pods with care to avoid crushing them. Once you’ve identified the perfectly ripe pods, follow these steps to ensure a successful harvest.
Step-by-Step Harvesting Process
- 1 Monitor pods daily: Check for brown, dry pods that begin to split open slightly. Shake a pod gently—if seeds rattle inside, it’s ready.
- 2 Harvest on a dry day: Use pruning shears to cut the entire seed pod from the vine. Avoid pulling or twisting, which can damage the stem or pod.
- 3 Open pods carefully: Place the pod on a paper bag or envelope and gently squeeze or tap it to release seeds. Avoid crushing seeds by using your fingers, not tools.
- 4 Dry seeds thoroughly: Spread seeds on a paper towel in a dry, shaded area for 3-5 days. Stir them occasionally to prevent mold. Seeds are ready when they’re completely dry and hard.
- 5 Store seeds properly: Place dried seeds in a paper envelope or airtight container with a silica gel packet to absorb moisture. Label with the harvest date and store in a cool, dark place for up to 2 years.
One common mistake I see is harvesting seeds too early, when pods are still green. Green pods contain immature seeds that won’t germinate. Another pitfall is storing seeds in plastic bags without drying them first—this leads to mold and rot.
Always prioritize dry conditions and gentle handling to keep your seeds viable.
If you’re in a warmer climate, moonflower pods may ripen earlier, so stay vigilant. In cooler regions, pods might take longer to dry. The key is to observe your plants and act when pods show signs of natural splitting.
With patience and care, you’ll have a bountiful seed stash ready for next season’s moonlit garden displays.
Once your seeds are stored, you’re ready to plant them in spring after the last frost. Direct sow them in well-draining soil and keep them moist until germination. Happy harvesting—your future moonflowers will thank you! 🌙