
Picking
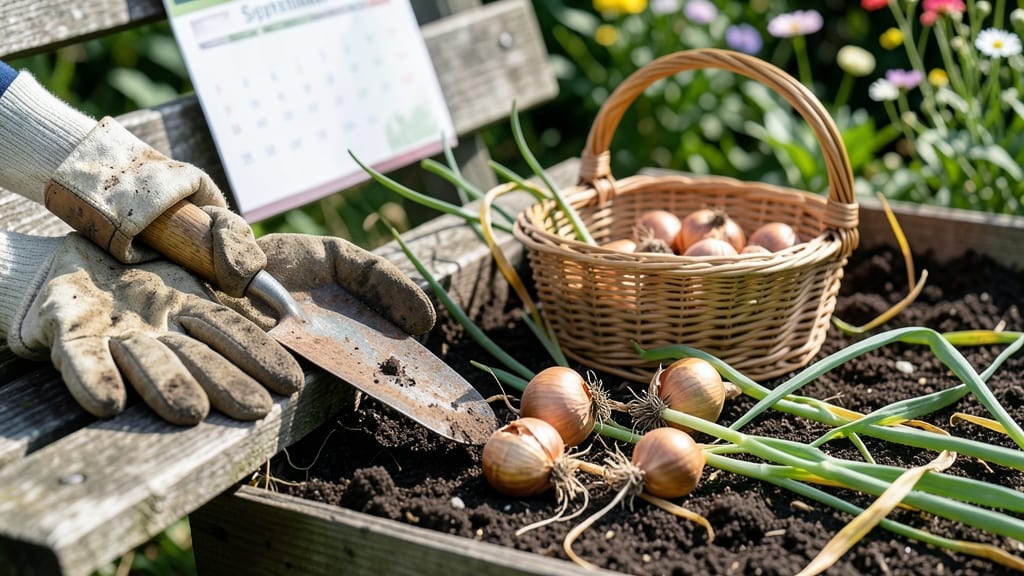
Harvesting shallots planted in spring at the right time ensures sweet, tender bulbs 🧅—not tough, pungent ones—so timing is everything.
Picture this: you’ve nurtured your shallots all season, and now the tops are turning yellow while the bulbs swell beneath. But how do you know if they’re truly ready? Miss this window, and you’ll end up with flavor that’s more bite than bite-sized delight.
In this guide, I’ll walk you through the three key signs to spot—from clove size to soil checks—that guarantee you harvest at peak flavor. Whether you’re in Zone 6a or beyond, these tips will help you avoid common mistakes and store your harvest like a pro.
Ready to go from guessing to knowing? Let’s dive into the exact cues that tell you: “Yes, it’s time!”

Shallot harvesting by clove size: the 3 key stages to watch
Harvesting shallots at the right time ensures you get those sweet, mild bulbs perfect for cooking. For spring-planted varieties like French Grey and Red Creole, timing is everything. The key lies in watching clove size and bulb formation—both tell you exactly when to dig.
Too early, and you’ll get small, pungent shallots; too late, and they’ll split or rot.
I’ve learned the hard way that rushing the harvest leads to disappointment. The secret is patience—waiting for the right visual cues and clove diameter guarantees the best flavor. Whether you’re growing yellow shallots or purple varieties, these three stages will help you nail the perfect harvest window every time.
-
Stage 1: Early Growth (1/4-inch cloves)
30-60 days after planting
Cloves are pea-sized (1/4-inch) with green tops. Soil should be moist but not soggy. Avoid harvesting now—bulbs are too small and won’t store well. -
Stage 2: Ideal Harvest (1/2-inch cloves)
90-120 days after planting
Cloves reach 1/2-inch diameter with papery skins forming. Tops turn yellow (50% of leaves) and bulbs feel firm when pressed. This is the sweet spot for storage and cooking. -
Stage 3: Late Harvest (1-inch cloves)
120-150 days after planting
Cloves grow to 1-inch diameter with fully papery skins. Tops are brown and crispy. Harvest here for larger bulbs, but flavor may be stronger. Best for immediate use, not long-term storage.
At Stage 1, your shallots are still in their infancy. The cloves are tiny—about the size of a pea—and the tops remain vibrant green. This is when most gardeners make the mistake of digging too soon, thinking the bulbs are ready.
But trust me, patience pays off. These early harvests often lack the sweetness and storage potential of fully mature shallots.
By Stage 2, you’ll notice a dramatic change. The cloves have doubled in size, reaching about 1/2-inch in diameter. The real giveaway? The tops start turning yellow, and the skins develop a papery texture.
This is the golden window for harvesting—when flavor and storage life peak. I always mark my calendar for this stage, especially for varieties like French Grey, which thrives in this sweet spot.
If you wait until Stage 3, your shallots will be at their largest—cloves can reach up to 1-inch in diameter. The tops will be completely brown and crispy, almost like straw.
While these bulbs are great for immediate use, they tend to have a stronger flavor and may not store as long. For long-term storage, I always aim to harvest at Stage 2.
Pro tip: Gently dig around the base of the plant to check bulb size without damaging the roots. If the cloves feel firm and the skins are papery, it’s time to harvest.
For Red Creole shallots, I find they often mature slightly faster than yellow varieties, so I keep a closer eye on them.
One mistake I’ve seen new gardeners make is harvesting based solely on leaf color. While yellowing tops are a key sign, they should be paired with clove size and skin texture.
A bulb with yellow leaves but still small cloves isn’t ready—wait a few more weeks. Conversely, bulbs with brown leaves but soft cloves have passed their prime.
For spring-planted shallots, timing your harvest also depends on your climate zone. In cooler regions (like USDA Zone 5), aim for late summer harvests. In warmer zones (like Zone 8), you might harvest as early as mid-summer.
Always check your local frost dates—shallots can tolerate light frosts but prefer to be harvested before temperatures drop below 50°F.
Remember, the goal is to harvest when the bulbs are firm, dry, and fully mature. This ensures they’ll store well and deliver that mild, sweet flavor you love in dishes.
Whether you’re growing shallots for fresh eating or long-term storage, these stages will help you avoid common pitfalls and enjoy a successful harvest every time.
Soil and weather checks that confirm harvest readiness
Beyond leaf color and bulb size, the soil moisture and air temperature are your secret weapons for nailing the harvest window. When your shallots are planted in spring, these checks become your final confirmation that the bulbs are ready—no more guessing.
I’ve learned the hard way that ignoring these signals leads to either premature harvesting (small, pungent bulbs) or over-maturity (tough, woody textures).
Start by testing the soil moisture around your shallots. Stick your finger about 2 inches deep—if it feels dry but not bone-dry, that’s your sweet spot. Overly moist soil can delay maturity, while bone-dry conditions stress the plants.
Aim for soil that crumbles slightly when squeezed but holds together. This balance ensures your shallots are fully matured without splitting or rotting.
Next, monitor the air temperature. Shallots thrive when daytime temps hover between 60°F and 75°F—this is their ideal harvest window. If temperatures consistently dip below 60°F or climb above 80°F, growth slows or halts.
In Zone 6a, this typically aligns with late August to early September, but always check your local frost dates to avoid catching a cold snap.
Now, let’s talk bulb firmness. Gently squeeze a bulb through the soil—it should feel firm like a tennis ball, not soft or mushy. If it’s still small and squishy, give it another 7-10 days.
Over-mature bulbs, on the other hand, feel hard and woody, with skins that split easily. These are past their prime and will lack the mild, sweet flavor you’re after.
| Check | Ideal Condition | What It Means |
|---|---|---|
| Soil Moisture | Dry but crumbly | Bulbs are fully hydrated for harvest |
| Air Temperature | 60°F–75°F | Peak growth and flavor development |
| Bulb Firmness | Firm like a tennis ball | Ready for harvest; sweet and tender |
| Leaf Color | Yellowing, dry tops | Nutrients redirected to bulbs |
| Bulb Size | 1–2 inches diameter | Optimal for storage and cooking |
If you’re still unsure, dig up one test bulb to check its readiness. A ready shallot will have a tight neck where the bulb meets the stem and a papery skin that peels back easily. If the bulb feels soft or the skin is still tight, wait another week.
Pro tip: Harvest on a dry, sunny morning to let the soil firm up, making it easier to dig without damaging the bulbs.
Finally, watch for over-maturity signs like split skins or bulbs that push above the soil line. These are past their prime and will spoil quickly. If you spot these, harvest immediately—even if they’re not perfect—to salvage what you can.
With these checks, you’ll never miss the window again and always enjoy shallots at their peak flavor.